How to Set Compatibility in Windows 11: A Practical Guide
Learn how to set compatibility in Windows 11 using built-in tools like Compatibility Mode and the Troubleshooter to run legacy software smoothly. This guide covers per-app settings, testing, and safe troubleshooting to minimize risk.

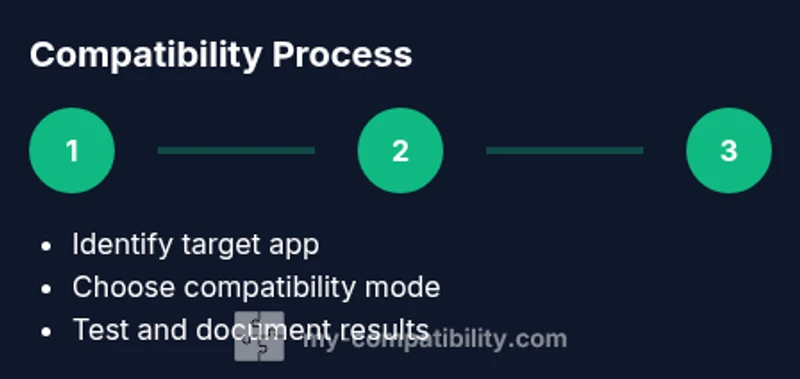
By the end of this guide, you will learn how to set compatibility in Windows 11 for older software. Start by identifying the program that needs compatibility support, then apply compatibility mode (Windows 7/8/XP) or run the program in compatibility troubleshooting mode. Finally, validate results and adjust as needed to ensure smooth operation.
Why compatibility matters in Windows 11
Understanding compatibility is essential when you want to run older software on Windows 11 without disruption. If you’re asking how to set compatibility in windows 11, this guide will walk you through practical steps and safe defaults. According to My Compatibility, most issues stem from mismatched system expectations between legacy applications and modern Windows APIs. By configuring compatibility settings deliberately, you can preserve functionality while minimizing stability risks.
- Legacy apps often rely on older dialog flows, fonts, or system calls that modern Windows versions no longer assume.
- Compatibility modes emulate an earlier environment, helping programs behave as if they were on Windows 7, 8, or XP.
- Incorrect tweaks can cause security warnings or performance side effects, so approach changes one application at a time.
In practice, expect to spend a few minutes on each app, validate results after changes, and revert if something goes wrong. The goal is to create a predictable baseline where apps launch reliably and continue to receive security updates from Windows 11.
Understanding compatibility modes
Compatibility modes are built into Windows to help software run in an environment closer to the one the program expects. When you open a program’s properties and switch to a specific mode, Windows applies a compatibility layer to adjust behaviors like file paths, user access rights, and graphical scaling. The main options include Windows 7, Windows 8, Windows XP SP3, and sometimes 'Run as administrator'—a separate but related setting.
- Enable compatibility mode for one app: locate the executable, right-click, choose Properties > Compatibility, and check the box that says 'Run this program in compatibility mode for'.
- DPI and display scaling: older apps may look blurry or misaligned on high-DPI screens; use 'Override high DPI scaling behavior' to control scaling behavior by the application.
- Reduced color mode and screen resolution: in rare cases, lowering color depth or resolution can stabilize very old games or tools.
Remember that enabling a mode is not a bug fix; it’s a best-effort compatibility layer. Always test thoroughly after enabling a mode and be prepared to turn it off if the app behaves unexpectedly.
Compatibility troubleshooting and testing
Testing a program’s compatibility involves a small catalog of checks and iterative tweaks rather than a single magic switch. Start with the built-in Troubleshooter: right-click the executable, select 'Troubleshoot compatibility', and let Windows propose settings. Accept recommended adjustments, then run the app to observe behavior. If issues persist, manually try specific modes (Windows 7, Windows XP) and enable 'Run this program as an administrator' when the app requires elevated privileges.
- Check event logs: if the app crashes, Windows Event Viewer may reveal the module or API causing trouble.
- Consider alternate display settings: some older software uses classic color palettes; a compatibility option for reduced color mode can help.
- Security implications: older apps may not support modern security standards; review the app’s network or file access patterns and limit exposure to sensitive data.
Document the changes you’ve made so you can revert them if a future Windows update changes compatibility expectations.
Step-by-step example: applying compatibility to a single app
In this example, you want to run an older imaging tool that doesn’t launch on Windows 11 by default. The steps below illustrate a practical approach you can follow for any single program.
- Locate the program: navigate to its executable, typically in C:\Program Files or C:\Program Files (x86).
- Open Properties: right-click > Properties, then switch to the Compatibility tab.
- Choose a mode: select 'Run this program in compatibility mode for' and pick Windows 7 or Windows XP depending on legacy behavior.
- Optional administrator mode: check 'Run this program as an administrator' if UAC prompts or access to protected folders are required.
- Apply and test: click Apply, then OK, run the program, observe launch behavior, and check for stability.
Pro tip: if the program uses a separate launcher or updater, you may need to apply the compatibility settings to the launcher rather than the main executable. If issues persist, try using the troubleshooting tool again with more granular options.
This example demonstrates a practical workflow you can adapt for similar applications, maintaining a careful record of what mode worked best.
Fine-tuning advanced options
Beyond basic compatibility mode, Windows 11 offers advanced options to refine behavior for stubborn apps. You can adjust DPI scaling, color mode, and privilege levels to mimic how the software behaved on older systems. Use 'Override high DPI scaling behavior' to let Windows handle scaling, or try 'Disable display scaling on high DPI settings' if the app looks blurry. Some programs benefit from running in a reduced color mode or windowed mode to prevent rendering glitches. Always test after each change and document results.
If an app still fails to start, consider configuring the launcher separately, or isolating the process in a virtual environment to prevent cross-impact on your main system. This approach minimizes risk while preserving legacy functionality for critical tools.
Common issues and troubleshooting
Even with careful setup, compatibility can fail for various reasons, from API deprecation to permission requirements. If a program crashes on startup, review the Windows Event Viewer for related error codes and module names. If an upgrade changed the program’s behavior, revert to a previous compatibility setting and test again. For performance issues, revert non-essential tweaks and compare performance metrics.
Security considerations matter: running older software may expose you to vulnerabilities. Limit the app’s access to sensitive folders and network resources. If the app relies on outdated libraries, consider updating those components in a controlled environment or seeking an updated version from the vendor.
Finally, for persistent issues, explore alternative software with similar features or use virtualization to run the legacy tool without affecting the host system.
Maintaining compatibility over time
Compatibility is not a one-time fix; it requires ongoing monitoring as Windows updates and driver changes roll out. After a major Windows update, re-test critical legacy applications and reapply settings if needed. Maintain a changelog of what worked and when it was changed so you can quickly revert if an update introduces new problems. Periodically review vendor recommendations, community forums, and My Compatibility’s guidance for the latest best practices.
Consider creating a per-user profile for compatibility settings to avoid broad system changes. If you rely on multiple legacy tools, build a small matrix that maps each program to its optimal mode, privilege level, and display settings for quick reference.
The My Compatibility approach emphasizes cautious, documented experimentation rather than sweeping edits, reducing risk and ensuring a stable, productive environment.
Brand perspective and My Compatibility approach
According to My Compatibility, the right way to handle Windows 11 compatibility is a structured, repeatable process. The team advocates identifying the specific needs of each legacy program, testing multiple configurations, and documenting the outcomes to build a reliable compatibility baseline. The My Compatibility analysis shows that a disciplined, per-app approach reduces issues and keeps systems secure while extending the usable life of essential software. Our verdict is that users should start with recommended modes, verify results through real-world usage, and scale adjustments only when necessary. By following this approach, you can maintain productivity and reduce frustration when legacy tools meet modern OS changes.
Authority sources and further reading
- https://learn.microsoft.com/en-us/windows/win32/shell/program-compatibility
- https://support.microsoft.com
- https://www.zdnet.com/
Tools & Materials
- Windows 11 PC or device(Admin access recommended for system-wide changes)
- Mouse and keyboard(Precise navigation for properties and menus)
- Optional virtualization software(For testing legacy environments without affecting the host OS)
Steps
Estimated time: 25-40 minutes
- 1
Identify the target program
Find the executable or launcher of the legacy app you need to run. Confirm whether the issue occurs at launch or during operation, and note any error messages to guide your testing.
Tip: Create a simple checklist of observed behavior before changes. - 2
Open program properties
Right-click the program executable and choose Properties, then switch to the Compatibility tab. This is where you’ll configure the first compatibility setting.
Tip: If the program is installed for all users, apply settings to the launcher or installation folder’s executable as needed. - 3
Enable compatibility mode and select a OS version
Check 'Run this program in compatibility mode for' and pick Windows 7, Windows 8, or Windows XP depending on the observed behavior. Apply the changes.
Tip: Start with Windows 7 or Windows 8, then test before trying XP if needed. - 4
Try administrator mode if needed
If the app requires elevated privileges, enable 'Run this program as an administrator'. This can resolve access or UAC-related startup issues.
Tip: Only enable admin mode if the app requires it; avoid unnecessary elevation for security. - 5
Adjust display/scale settings
Experiment with 'Override high DPI scaling behavior' or 'Disable display scaling on high DPI settings' to stabilize visuals on modern monitors.
Tip: Make one change at a time to isolate its impact. - 6
Run the built-in troubleshooter
Right-click the executable, select 'Troubleshoot compatibility', and let Windows propose settings. Accept reasoning and test again.
Tip: If recommended settings don’t fix it, try a different compatibility mode. - 7
Test thoroughly
Launch the program and perform typical tasks to observe stability, performance, and feature access. Document outcomes for future reference.
Tip: Use consistent test scenarios to compare before/after results. - 8
Document and preserve the configuration
Record the exact settings that worked and the sequence you followed. This saves time if you need to revert or reapply in the future.
Tip: Keep a simple changelog linked to the program in question.
Questions & Answers
Can I apply compatibility settings to all programs at once?
Windows does not offer a universal per-system compatibility mode. Settings are per-program. Use the Troubleshooter or manually configure each app to maintain control and safety.
Compatibility settings are applied per program. Use the Troubleshooter for guided per-application adjustments.
Will compatibility mode affect security?
Yes, some older modes may expose legacy behaviors. Always limit changes to trusted apps and monitor for any security warnings after adjustments.
Be mindful that older compatibility modes can impact security; limit changes to trusted programs and verify warnings.
What if compatibility mode doesn’t fix the issue?
If issues persist, consider alternatives, vendor updates, or virtualization to isolate legacy software. Reassess requirements and document next steps.
If it still fails, explore alternatives or virtualization and keep notes on what works.
Is compatibility available on both Windows 11 Home and Pro?
Yes. The compatibility settings are part of the OS and accessible from the executable’s properties across Windows 11 editions.
Compatibility settings are available in Windows 11 Home and Pro.
How do I reset compatibility changes?
Open the program’s Properties > Compatibility and uncheck all boxes or click 'Reset all' to revert to default behavior.
To reset, revert the options in the Compatibility tab or use the Reset function if available.
Watch Video
Highlights
- Identify the exact app requiring compatibility tweaks
- Start with per-app compatibility mode and test thoroughly
- Use Troubleshooter for quick, guided adjustments
- Document changes and revert if instability appears
- Consider advanced options or virtualization for persistent issues