Check motherboard GPU compatibility: A practical guide
A thorough, step-by-step guide to check motherboard GPU compatibility, covering PCIe, power, clearance, BIOS, and practical tips for a safe upgrade.

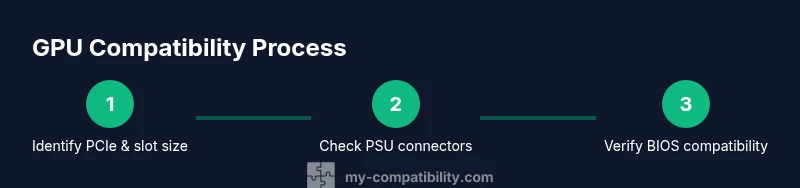
In this guide you will check motherboard GPU compatibility by verifying PCIe slot support, power delivery, physical clearance, and BIOS compatibility. Gather your motherboard model, GPU model, and power supply specs, then compare PCIe versions, connector types, and dimensions before purchasing. This quick, repeatable process helps you avoid bottlenecks or fit issues during a graphics upgrade.
Why GPU compatibility with motherboard matters
In PC building and upgrades, the question isn’t only whether a graphics card will physically fit; it’s whether the motherboard can support it reliably. According to My Compatibility, successful upgrades hinge on validating three core areas: compatibility signals (PCIe versions and lanes), power delivery, and physical clearance. When you check motherboard GPU compatibility, you’re also safeguarding system stability, preventing boot failures, and avoiding throttling caused by insufficient power or poor airflow. This section explains why these checks matter from a practical, real-world perspective. You’ll learn to translate product specs into a concrete compatibility decision, so you can buy with confidence and minimize returns. We’ll reference official specs, owner manuals, and community-tested guidelines so you have a repeatable process for any future upgrade—whether you’re installing a midrange card for 1080p gaming or planning a high-end setup for 4K graphics.
First, understand that PCIe slots, power connectors, and case dimensions each impose constraints. GPUs may require the maximum of a single PCIe x16 interface, or they may rely on additional slots for support brackets and cooling. If the card is too long for the case or too power-hungry for the PSU, you’ll run into problems right at boot or during under-load stress tests. In short: check motherboard GPU compatibility before you buy, not after.
Key Compatibility Factors to Check
- PCIe slot version and physical size: Most consumer GPUs use a PCIe x16 slot. Motherboards from different generations are typically backward compatible, but you won’t get peak bandwidth unless the slot version matches the GPU’s capabilities. Confirm the exact PCIe version (3.0, 4.0, 5.0) on the motherboard manual and verify the available x16 lane count. Also verify the card’s length and width to ensure it fits in your case without obstructing fans or adjacent expansion cards.
- BIOS/UEFI support: Some GPUs require a BIOS update to initialize properly, especially on older boards. If a card isn’t detected during POST, check the motherboard’s support page for recommended BIOS versions or compatibility lists. In some cases, enabling discrete GPU support in a legacy BIOS or enabling PCIe bifurcation settings can help.
- Power delivery and connectors: GPUs draw substantial power. Verify your PSU wattage rating and ensure you have the required PCIe 6-pin or 8-pin connectors—plus enough total rails to power the rest of the system. Don’t overlook adapters that can create issues with stability if the PSU isn’t sized for peak power.
- Physical clearance and airflow: Check the card length against case maximum GPU length and ensure the cooler won’t collide with M.2 drives or adjacent cards. Don’t forget about fan clearance below the GPU and available airflow paths to keep temps in check.
- Case form factor and motherboard size: ITX and smaller microATX builds often have tighter routing. Measure the available space, including the power cables and CPU cooler height, to avoid surprises after unboxing. If you’re using a vertical mounting kit, verify clearance for the PCIe slot bracket.
How to Gather Your System Specs
A precise compatibility check starts with accurate data. Collect your motherboard model, BIOS version, GPU model, and PSU wattage before you even compare specs. Here’s a practical checklist to follow:
- Identify the motherboard model from the printed label on the board, the BIOS splash screen, or the user manual. Note both the model and the BIOS version.
- Determine the PCIe layout: which x16 slot is designated for a graphics card, whether any other PCIe devices share lanes, and the card’s maximum supported length.
- Record the power supply details: total wattage, 12V rail distribution, and installed PCIe power connectors (6-pin, 8-pin, or 6+2-pin).
- Look up the GPU’s official spec sheet: length, width, number of PCIe power connectors, and power draw (TDP). Also confirm the GPU’s PCIe generation requirement.
- Use manufacturer product pages or trusted review sites to compare these specs side-by-side. If you can’t access a precise spec, contact support or consult the community consensus for your exact motherboard and GPU combination. This structured data gathering helps you avoid post-purchase regrets and speeds up the decision process for upcoming upgrades.
Understanding PCIe and BIOS Compatibility
PCIe is designed to be backward compatible, so a PCIe 4.0 graphics card will function in a PCIe 3.0 slot, but it will operate at the lower generation’s bandwidth. That doesn’t necessarily prevent functionality, but it can cap peak performance if the rest of the system isn’t balanced. In addition, the number of PCIe lanes and the available bandwidth from the chipset influence how much data can move between GPU and CPU, especially in CPU-limited titles or workloads. BIOS/UEFI support matters for device detection and initialization. If a new GPU is not detected, a BIOS update to the motherboard can unlock compatibility, as can enabling discrete GPU mode in the firmware. Some boards require a specific microcode or a vendor-provided compatibility list. Always cross-check the motherboard vendor’s compatibility page and read user-tested experiences to avoid surprises. If you’re unsure, lean on vendor resources and community forums for practical guidance.
Practical Scenarios and Setup Tips
Consider your goal: casual 1080p gaming vs. 4K rendering, streaming, or GPU-accelerated workloads. In a midrange build, you’ll typically match the GPU tier to the PSU and chassis. In compact cases, height and length may require a dual-slot, low-profile cooler card or even a horizontal mounting kit. For multi-GPU setups, ensure the motherboard, BIOS, and PSU support SLI or CrossFire if you intend to run more than one GPU; for most modern consumers, a single powerful GPU is more practical. If you’re upgrading from a much older GPU, you may also need to swap power cables or upgrade the case fans to maintain airflow. Finally, keep firmware up to date and verify that the GPU’s drivers are compatible with your OS version.
Space, Power, and Cooling: Real-World Considerations
Even a technically compatible GPU may fail in practice without proper space, power, and cooling. Measure your case interior dimensions and check the maximum GPU length with the side panel on, then plan cable routing so each connector reaches its GPU without forcing cables. Calculate power budget: add the GPU’s TDP to the rest of the system’s load, then add a safety margin (typically 10-20%). Ensure your case airflow supports cooler GPUs by leaving room for intake and exhaust paths; consider adding exhaust fans if temps rise under load. If you’re overclocking, factor additional headroom and stability testing into your plan. Real-world testing with monitoring software will help you detect overheating before it harms components.
Real-World Checklist You Can Use Today (Bottom-Line Guide)
Use this compact checklist to validate compatibility before purchasing or installing a new GPU: confirm PCIe x16 slot version and lane count, verify GPU length fits in the case, check the PSU has required PCIe power connectors and enough wattage, ensure BIOS or firmware updates are applied if recommended, and finally review manufacturer compatibility notes. If any item is uncertain, pause and double-check with the motherboard and GPU manufacturer support pages. With this disciplined approach, you’ll minimize the risk of compatibility problems and maximize the performance of your upgrade. The My Compatibility Team highly recommends documenting each spec and saving the results for future upgrades.
Tools & Materials
- Motherboard model number and user manual(Needed for PCIe version, lanes, BIOS compatibility)
- Graphics card model and official spec sheet(Length, PCIe version, power connectors, TDP)
- Power supply unit (PSU) with wattage rating(Ensure sufficient total wattage and PCIe connectors)
- PC case with adequate GPU clearance(Measure max GPU length and ensure airflow space)
- Measuring tools (ruler or calipers)(Used to verify GPU length and case clearance)
- Motherboard/manufacturer pages or manuals(Helpful for exact dimensions and supported GPUs)
Steps
Estimated time: 30-60 minutes
- 1
Identify GPU interface and size
Measure the GPU length and width and confirm it uses a PCIe x16 interface. Compare these dimensions to your case's GPU clearance spec to prevent interference with fans or drives.
Tip: Always measure with the case panels on and any PCIe brackets installed. - 2
Check motherboard PCIe slot and lanes
Locate the primary PCIe x16 slot and note its generation and lane count. If you plan to run another PCIe device, ensure the lanes won’t bottleneck the GPU.
Tip: Refer to the motherboard manual or BIOS splash screen for exact lane distribution. - 3
Verify PSUs and PCIe connectors
Count the available PCIe power connectors on the PSU (6-pin, 8-pin) and verify total wattage suffices for the GPU and rest of the system.
Tip: Avoid adapters if possible; use a PSU that natively provides required connectors. - 4
Assess BIOS/firmware readiness
Check for BIOS/UEFI updates on the motherboard support page and see if they mention GPU compatibility or any specific GPU models.
Tip: If the card isn’t detected, a BIOS update or enabling discrete GPU support can help. - 5
Confirm case and cooler clearance
Ensure the GPU cooler does not collide with CPU cooler, RAM, or M.2 drives. Allow space for adequate airflow around the card.
Tip: Add or reposition case fans to optimize airflow before installation. - 6
Gather OS and driver prerequisites
Make sure your operating system supports the GPU drivers and that you have a clean install plan to avoid driver conflicts.
Tip: Back up important data and create a system restore point before major driver changes. - 7
Do a dry-fit and connect power
Install the GPU into the PCIe slot without powering on, then attach power cables and confirm the card seats properly.
Tip: Hold the card by its edges and avoid touching gold contacts to minimize static risk. - 8
Power on and run tests
Boot the system, install drivers, and perform a basic stability test or gaming benchmark to verify performance and temperatures.
Tip: Monitor temps with a trusted tool and verify that fans ramp correctly under load.
Questions & Answers
Will a high-end GPU fit on a mini-ITX motherboard?
It can fit if the GPU length and cooler height are within the case's GPU clearance. You must also ensure the PSU has adequate PCIe power connectors and that the motherboard's PCIe slot and BIOS support the card.
A high-end card can fit in a mini-ITX build if length, height, and power are within limits, and the motherboard and PSU support it.
Do I need a BIOS update to support new GPUs?
Not always, but many older boards benefit from a BIOS/UEFI update to improve GPU detection and compatibility. Check the motherboard vendor’s support page for tested GPUs and recommended BIOS versions.
Often, a BIOS update helps with new GPUs; check the vendor’s page for guidance.
Can a PCIe 4.0 GPU work in a PCIe 2.0 slot?
Yes, but the GPU will run at PCIe 2.0/3.0 bandwidth, potentially limiting peak performance in bandwidth-intensive tasks. It will still function, but you may not see full potential in certain workloads.
Yes, it will work but may not reach peak performance due to bandwidth limits.
How do I estimate if my PSU is enough for a GPU upgrade?
Add the GPU’s TDP to the rest of the system’s load and include a 10-20% safety margin. If the total exceeds your PSU rating, consider upgrading the PSU or choosing a lower-TDP GPU.
Sum the GPU’s power draw with the rest of your system and compare to your PSU; upgrade if needed.
What if my GPU is physically long for my case?
Choose a GPU with a shorter length or a case with greater GPU clearance. In some builds, you may need to swap to a dual-slot cooler or adjust mounting.
If it’s too long, pick a shorter card or a case with more space.
Does PCIe bandwidth affect gaming performance?
In many gaming scenarios, PCIe bandwidth is not the bottleneck, especially with PCIe 3.0/4.0 GPUs. However, certain workloads and very high-end GPUs can benefit from higher lane counts and faster generations.
For most games, PCIe bandwidth isn’t the bottleneck, but some workloads may see gains with newer lanes.
Watch Video
Highlights
- Know your GPU and motherboard specs before buying.
- Power and clearance are as critical as PCIe compatibility.
- BIOS updates can expand compatibility without hardware changes.
- Measure, verify, and test to avoid post-purchase regrets.