How to Know If GPU Is Compatible with Your Motherboard
Learn how to verify GPU compatibility with your motherboard, covering PCIe versions, power connectors, physical fit, and BIOS considerations. This practical My Compatibility guide helps you avoid bottlenecks and wasted upgrades.

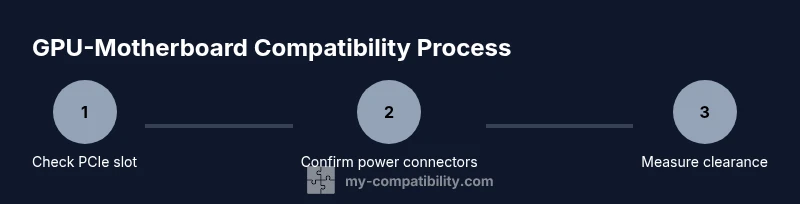
By the end, you’ll know if a graphics card will fit and function with your motherboard. You’ll check PCIe slot version and lane support, power connectors, GPU length, and PSU capacity. According to My Compatibility, start with the motherboard’s PCIe x16 slot and move through power, space, and BIOS considerations to prevent a compatibility bottleneck.
Understanding the Basics of GPU-Motherboard Compatibility
Understanding GPU compatibility starts with recognizing that most consumer graphics cards plug into a PCIe x16 slot and are designed to work across multiple motherboard generations. The key checks are the PCIe interface, the physical footprint, the power delivery path, and, occasionally, BIOS support. According to My Compatibility, the goal is to establish a baseline of compatibility before you buy or install anything. If you know the motherboard model, card model, and the case dimensions, you can quickly rule out outliers and focus on viable options. This section lays the mental framework for a practical, methodical evaluation rather than a trial-and-error approach.
- PCIe interface is backward compatible, but bandwidth can matter for the highest-end cards.
- Physical fit requires accurate measurements of case length and GPU thickness.
- Power delivery depends on connectors and the power supply’s capability.
- BIOS/UEFI nuance is rare but worth checking for older boards.
By adopting this framework, you reduce the risk of buying a GPU that won’t work with your motherboard, or that won’t physically fit inside your PC.
PCIe Slots and Versions
The PCIe interface is the backbone of discrete GPUs. Modern GPUs use PCIe x16 slots, but boards and slots vary by generation (PCIe 3.0, 4.0, 5.0). The good news: PCIe is backward compatible, so a PCIe 4.0 GPU typically works in a PCIe 3.0 x16 slot. The trade-off is bandwidth; the GPU will perform at or near its expected level within the limits of the slower bus. When evaluating compatibility, confirm the motherboard lists a PCIe x16 slot and note the generation supported. If you upgrade later to a PCIe 5.0 card, the card will still operate in a PCIe 4.0/3.0 slot, but not at PCIe 5.0 speeds until you upgrade the motherboard. This is a common cause of confusion that My Compatibility often helps to dispel.
- Always verify the motherboard’s PCIe generation and number of lanes.
- Expect backward compatibility across generations, with potential bandwidth bottlenecks on older boards.
- If you plan a future upgrade, consider a motherboard that supports the latest PCIe standard.
Physical Fit: Cards, Slots, and Case Clearance
GPU length, width, and mounting height matter as much as electrical compatibility. Even if a card is PCIe-compatible, it can hit the side panel or collide with a drive cage or RAM heat spreader. Measure your case’s maximum GPU length and compare it with the card’s listed length. Don’t forget to account for the cooling shroud, power connectors, and any PCIe riser or dummy bracket you might be using. My Compatibility emphasizes a simple rule: if you cannot physically fit the card with the doors closed and the panel seated, the specs don’t matter. Many mid-tower cases accommodate 11–12 inch cards; larger enclosures can handle longer designs.
- Use a ruler or tape measure to check the maximum card length.
- Consider the card’s cooling solution; bulkier coolers may require extra clearance.
- Check adjacent components (RAM height, NVMe heatsinks) for clearance conflicts.
Power Delivery: Connectors and PSU Capacity
Power is a frequent gating factor. GPUs require PCIe power connectors from the PSU, typically 6-pin and/or 8-pin (or newer 12VHPWR for higher-end cards). Ensure your PSU has the correct connectors in sufficient quantity and that its total wattage meets the GPU’s TDP requirement plus the rest of the system. If your PSU is older or undersized, you may need to upgrade. Always verify the total system load under peak gaming conditions and compare to PSU spec. This prevents power starvation, which causes crashes or boot failures.
- Confirm available PCIe power connectors on the PSU.
- Verify total wattage in line with GPU requirements and CPU/motherboard demands.
- Plan for potential cable management challenges when routing power cables.
BIOS/UEFI Considerations for GPUs
Some older motherboards may require a BIOS update to ensure full compatibility with newer GPUs, particularly when booting with a modern PCIe card. Check the motherboard manufacturer’s site for the latest BIOS version and the compatibility notes, especially if you’re reusing an older board with a new GPU. If a BIOS update is advised, follow the official instructions carefully to avoid brick risks. In most cases, GPUs function without BIOS intervention, but it’s prudent to verify.
- Look for BIOS release notes mentioning PCIe or GPU compatibility.
- Back up current BIOS and prepare a reliable update plan.
- If the system posts but has display issues, a BIOS update may resolve it.
Checking Dimensions: Length, Width, and Clearance
Beyond length, thickness (how many slots the card occupies) matters in multi-slot configurations. Some GPUs occupy three slots and may block adjacent PCIe slots or exhaust heat toward the motherboard. Check the motherboard’s spacing between PCIe slots and ensure there’s room for a triple-slot cooler without causing obstruction. A common pitfall is assuming the slot pitch is uniform across boards; verify the layout using the motherboard manual and visual inspection.
- Review the motherboard’s PCIe slots’ positions and spacing.
- Confirm that adjacent components won’t block airflow or physically collide with the card.
- Account for any aftermarket cooling solutions on the GPU.
Step-by-Step Compatibility Checklist
Use this practical checklist to confirm compatibility before purchase or install. Each item is a single action you can complete quickly.
- Record motherboard model and GPU model.
- Verify PCIe x16 slot presence and generation on the motherboard.
- Check the GPU’s length and compare with case clearance.
- Confirm PSU has required PCIe power connectors and adequate wattage.
- Review BIOS/UEFI notes for PCIe or GPU updates.
- Check for any known compatibility issues between the specific motherboard and GPU on manufacturer forums and reputable tech sites.
- Plan cable routing and physical installation to minimize risk of strain on connectors.
- Install the GPU and perform a clean boot with basic drivers before enabling gaming functionality.
Tip: If any step is unclear, pause and verify with official product pages or trusted reviews. A careful pre-check saves time and money.
Using Manufacturer Specs and Online Databases
Your most reliable source of compatibility information is the official product pages and the motherboard’s manual. Compare the GPU’s dimensions, power requirements, and PCIe interface against the motherboard’s documented features. Online databases like PCPartPicker and reputable hardware review sites can help verify that your chosen components work together. Always cross-check part numbers and revision histories, since minor variations between board revisions can alter clearances and connector availability.
- Gather official spec sheets for both GPU and motherboard.
- Use reputable databases to confirm compatibility.
- Check user forum reports for case-specific fit notes.
Real-World Scenarios and Common Pitfalls
In practice, many builds fail compatibility checks due to a single factor: power or physical fit. For example, a high-end GPU might require more power connectors than your PSU offers, or a large triple-slot cooler may not clear a tall CPU cooler or memory modules. Another pitfall is assuming PCIe bandwidth is the only factor; while backward compatibility helps, an older motherboard may also have a weaker PCIe slot traces that marginally limit peak GPU performance. Before you buy, simulate the build with measurements and a bill of materials to avoid surprises at install time.
- Always measure and plan before buying.
- Don’t assume that the latest GPU will automatically fit older boards.
- Consider a modestly sized GPU if case or PSU are conservative.
Troubleshooting After Installation
If the system boots but the display is blank or shows artifacts, revert to a clean driver install and reseat the card. Recheck power connections and ensure the PCIe slot is fully seated. If the card isn’t detected in BIOS, try a different PCIe slot if available and reset BIOS settings to default. For persistent issues, test with a known-good GPU to isolate whether the motherboard, PSU, or GPU is at fault. Document every step you take to accelerate support conversations.
- Reseat cables and card securely.
- Try alternate PCIe slots if supported.
- Test with a known-good GPU to identify the failing component.
Upgrading Paths and Future-Proofing
If you’re planning an upgrade in the near future, consider a motherboard with the latest PCIe generation to avoid bandwidth bottlenecks. Check for adequate GPU power connectors and ensure the PSU has a modular cable setup to simplify future upgrades. Budget for a potential case upgrade if your current enclosure has limited clearance. My Compatibility recommends building with a balance of future-proofing and current needs to maximize value and minimize churn.
- Favor boards with modern PCIe generations and sufficient lane bandwidth.
- Ensure PSU headroom for future GPU upgrades.
- Plan for case and airflow improvements when upgrading long-term.
My Compatibility Insight: Practical Takeaways
According to My Compatibility, the simplest way to know if GPU is compatible with motherboard is to verify PCIe compatibility, physical fit, power delivery, and BIOS readiness in a structured checklist. This reduces guesswork and aligns your parts with real-world constraints. The My Compatibility team emphasizes starting with the motherboard’s PCIe x16 slot, confirming power connectors, and ensuring ample case clearance before committing to a purchase. By following a disciplined approach, you’ll avoid common bottlenecks and keep upgrade options open.
Authority Sources
For deeper technical grounding, consult official specifications and reputable publications.
- PCI-SIG PCIe specification: https://pcisig.com/
- Tom's Hardware GPU buying and compatibility guides: https://www.tomshardware.com/
- AnandTech PCIe and GPU-related reviews: https://www.anandtech.com/
Tools & Materials
- Motherboard model number or SKU(Record exact model and revision from the box or BIOS screen.)
- Graphics card model and power requirements(Note PCIe version and TDP from the official spec sheet.)
- Power supply unit (PSU) wattage and PCIe connectors(Check total wattage and availability of 6-pin/8-pin/12VHPWR as needed.)
- Case and GPU clearance awareness(Measure GPU length and ensure space for cooling and cables.)
- Measuring tape or ruler(Precise measurements help prevent misfits.)
- Anti-static wrist strap (optional but recommended)(Reduces risk of component damage during handling.)
- Phillips screwdriver (optional)(Needed for securing the GPU and case panels.)
Steps
Estimated time: 60-90 minutes
- 1
Gather exact specs
Collect the motherboard model number, GPU model, and PSU details before starting. This ensures you are evaluating the correct hardware and avoids ambiguous assumptions. Cross-check revision numbers in case of hardware updates.
Tip: Use the box labels or manufacturer support pages to confirm revisions. - 2
Verify PCIe slot compatibility
Check that the motherboard has an x16 PCIe slot and confirm its generation. PCIe is backward compatible, but ensure the slot provides sufficient bandwidth for your GPU to avoid throttling.
Tip: If you plan a future GPU upgrade, prioritize PCIe 4.0/5.0 capable boards. - 3
Measure physical fit
Measure the GPU length and compare with the case clearance. Include the length of any cooling shroud. Also verify width and height to avoid contact with RAM or capacitors.
Tip: Leave a small clearance buffer for airflow. - 4
Assess power requirements
Match the GPU’s connector needs with the PSU. Ensure enough PCIe power connectors and overall wattage to meet peak GPU load plus system overhead.
Tip: If unsure, add 100–200W headroom to your PSU estimate. - 5
Check BIOS/UEFI notes
Look up the motherboard’s BIOS version and relevant release notes. Some older boards benefit from a BIOS update to support newer GPUs.
Tip: Back up current BIOS and follow official update steps. - 6
Plan cable routing
Preview how cables will route behind the motherboard tray and around the GPU. Poor routing can impede airflow and cable life.
Tip: Use modular PSUs to reduce cable clutter. - 7
Prepare installation
Power down, unplug, and ground yourself. Install GPU into the PCIe slot with even pressure and fasten the screws securely.
Tip: Avoid wiggling the card; a firm seated connection is essential. - 8
Post-install verification
Boot the system, install latest drivers, and run a quick stress test to confirm stability and performance.
Tip: Monitor temperatures and power draw during initial runs.
Questions & Answers
What is the minimum PCIe requirement for modern GPUs?
Most modern GPUs require a PCIe x16 slot, typically compatible with PCIe generations back to 3.0. The key is adequate bandwidth; older slots may bottleneck high-end GPUs.
Most GPUs need an x16 PCIe slot and enough bandwidth, usually compatible with PCIe 3.0 and higher.
Will a new GPU work in an older motherboard if the case fits?
Not always. Check PCIe version support, power connector availability, and BIOS compatibility. Even if the card physically fits, insufficient power or older BIOS can prevent operation.
Physical fit isn’t enough—power, PCIe, and BIOS must also be compatible.
Do I need a BIOS update before installing a new GPU?
Often not required, but on older motherboards, a BIOS update can improve PCIe recognition and stability with newer GPUs. Always consult the motherboard vendor’s release notes.
Sometimes a BIOS update helps with newer GPUs; check the vendor notes first.
How can I verify GPU power requirements match my PSU?
Compare the GPU’s TDP and required connectors with the PSU’s total wattage and available PCIe cables. Use a headroom margin to accommodate other components.
Make sure your PSU can handle the GPU’s power needs with some extra headroom.
What should I do if the GPU is not detected in BIOS?
Reseat the card, try a different PCIe slot if available, and reset BIOS to default. Check cable connections and ensure the PSU is supplying power.
Reseat, test another slot, and reset BIOS if the GPU isn’t detected.
Are multi-GPU setups common today?
Multi-GPU configurations are less common now and support varies by game and driver. For most users, a single capable GPU offers the best experience.
Most users stick to a single GPU; multi-GPU setups are less common and game-dependent.
Highlights
- Verify PCIe compatibility first
- Check physical fit before buying
- Ensure adequate GPU power supply and connectors
- Update BIOS when recommended by the motherboard maker
- Test post-install to confirm stability and performance