Check motherboard compatibility: A practical guide today
Learn how to check motherboard compatibility across CPUs, RAM, PCIe devices, and power supplies. This practical, step-by-step guide helps you avoid compatibility issues and costly upgrades.

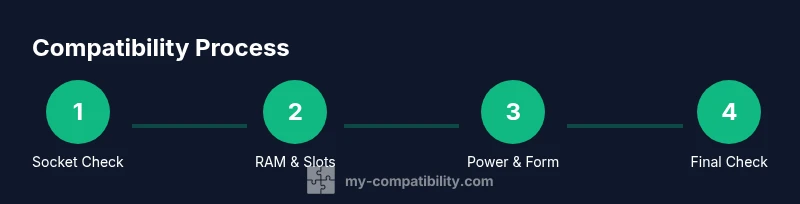
To check motherboard compatibility, start by identifying the motherboard’s socket and chipset, then verify CPU fits that socket. Next, confirm RAM type, speed, and capacity match the board’s supported specs; check PCIe slots for expansion; and confirm the form factor fits your case power supply. According to My Compatibility, following this checklist reduces upgrade surprises and ensures reliable performance.
What compatibility means for a motherboard
Compatibility means that the motherboard can physically fit your components and support them at their rated specs. When you check motherboard compatibility, you ensure the CPU socket matches the motherboard, RAM type and speed are supported, PCIe devices are compatible, and the power and form factor align with your case and PSU. This foundational concept guides every build and prevents costly mismatches. In practice, compatibility is a balance of sockets, standards, and clearances — a short checklist that pays off with fewer boot failures and smoother upgrades.
Core components to verify
Before buying or building, list the core components and confirm they align with the motherboard's specs. Start with the CPU socket and chipset; check for the exact socket type (for example, LGA or AM4/AM5) and the motherboard's CPU support list. Then verify RAM type (DDR4 vs DDR5), supported speeds, and maximum capacity per channel. Also confirm PCIe version support, M.2 slots, and SATA port counts to accommodate drives and GPUs. Finally, ensure the form factor (ATX, microATX, ITX) matches your case and that power connectors align with the PSU. My Compatibility analysis shows that accurate initial matching dramatically reduces troubleshooting later.
CPU and socket compatibility explained
The CPU must be compatible with the motherboard's socket and chipset. Even within the same socket family, revisions can affect electrical signaling and microcode support. Always consult the motherboard’s CPU compatibility list from the vendor and confirm BIOS requirements before purchasing. If you plan to use a newer CPU, verify that the board’s BIOS version supports it, or budget time for a firmware update after assembly. This reduces the risk of a non-booting system and post-purchase regret.
RAM compatibility essentials
RAM compatibility is not just about slots; it involves generation, type, speed, and voltage. The motherboard must support the RAM generation (DDR4, DDR5) and the advertised speeds; higher speeds may require enabling XMP/DOCP in BIOS. Check the number of DIMM slots and maximum total capacity so you can plan future upgrades. Also note whether the board supports ECC RAM, if that matters to your use case. Mistakes here are common and often prevent the system from posting.
Expansion cards and PCIe considerations
PCIe slot version and lane distribution determine how GPUs, NVMe drives, and add-on cards perform. Verify the number of PCIe x16 slots, any electrical constraints, and whether x1/x4/x8 slots are available for other devices. Some boards disable certain slots when a high-powered GPU is installed; others have shared bandwidth across slots. Confirm spacing so your board and cooler don’t clash with a large GPU or M.2 heat sink. This prevents clearance issues and throttling.
Power delivery and ATX form factor
Power delivery must match the motherboard’s power connectors and the system’s needs. Check the 24-pin main power connector and any 8-pin CPU power connectors required by the board. If you plan multiple GPUs or high-end CPUs, ensure the PSU has enough wattage and the right PCIe power cables. Form factor (ATX, mATX, ITX) also dictates mounting holes and standoff positions, which influence case compatibility and airflow. A mismatch here can prevent boot or cause instability under load.
Case and mounting considerations
Case compatibility starts with form factor and clearances. The motherboard must fit the case’s mounting points, with sufficient space for I/O shields and rear exhaust. Check the board-to-case space around the CPU cooler to avoid clashes with tall heatsinks. Don’t overlook cable routing and header positions (USB, front panel, audio) that may affect your build’s aesthetics and airflow. Proper mounting reduces stress on traces and connectors during assembly.
BIOS and firmware considerations
BIOS compatibility can unlock support for newer CPUs and memory kits. If a board lacks native support for a CPU, a BIOS update may be required. Some boards require a prior supported CPU to perform a BIOS flash, so plan accordingly. Save a backup plan, and verify whether the vendor offers a recovery BIOS or dual-BIOS feature in case of unsuccessful updates. Keeping firmware current improves stability, performance, and security.
Step-by-step compatibility checklist
Create a written checklist and work through it methodically: (1) confirm CPU socket and chipset; (2) verify CPU support list and BIOS requirements; (3) confirm RAM type, speed, and capacity; (4) check PCIe slots and NVMe/m.2 support; (5) verify form factor and case compatibility; (6) confirm PSU wattage and connectors; (7) assess cooling clearance; (8) review vendor compatibility resources for any caveats. By ticking each item, you reduce unknowns before buying or building.
Common pitfalls and how to avoid them
Common mistakes include assuming all CPUs fit a socket, overlooking RAM speed limits, and ignoring case clearance for large GPUs or cooling solutions. Avoid buying parts without checking vendor compatibility lists and don’t rely solely on online rumors. Always verify the latest official specs and allow some headroom for future upgrades.
Tools to simplify the process
Use vendor product pages, official compatibility charts, and PC building tools to cross-check parts. Build a simple spreadsheet noting socket, RAM type, speed, and power requirements for each component. Where possible, rely on official Q&A sections or community forums moderated by the motherboard manufacturer for edge cases.
Maintenance and future-proofing
After a successful build, document all part numbers, BIOS versions, and firmware levels. When upgrading, re-check compatibility lists and consider leaving space for higher RAM speeds or additional PCIe devices. Regularly revisit the motherboard’s support page for BIOS updates tied to new CPUs or RAM generations. This habit minimizes future upgrade friction.
Tools & Materials
- Motherboard model and specification sheet(Document socket type, chipset, RAM support, PCIe lanes, and form factor)
- CPU model and socket details(Match to motherboard CPU support list)
- RAM kit specifications (type, speed, capacity)(Verify DDR generation and voltage)
- Power supply (adequate wattage and PCIe connectors)(Check for required 8-pin/4+4-pin CPU power and PCIe power cables)
- Case form factor and mounting hardware(ATX/mATX/ITX compatibility; standoffs and screws)
- Screwdriver (Phillips #2)(Needed for mounting the motherboard and components)
- Anti-static wrist strap or mat(Prevents ESD damage during handling)
- Cable ties and organizer(Helps with clean routing and airflow)
Steps
Estimated time: 2-3 hours
- 1
Identify CPU socket and motherboard socket compatibility
Start by confirming the CPU socket type and match it to the motherboard’s supported sockets. Check the chipset family and any BIOS version prerequisites. This ensures the CPU physically and electronically interfaces with the board.
Tip: Cross-check the motherboard’s official CPU support list for exact model compatibility. - 2
Verify CPU, RAM, and PCIe compatibility
Verify that the CPU is listed as supported, RAM is the correct generation and speed, and PCIe devices will fit the available slots without obstruction. Confirm M.2/NVMe support if you plan fast storage.
Tip: Choose RAM with a speed that the motherboard officially supports for best stability. - 3
Confirm form factor and case fit
Ensure the motherboard form factor matches the case (e.g., ATX in a mid-tower). Check standoff positions and I/O shield alignment to avoid mounting issues.
Tip: Place the board inside the case prior to any lifts or big heatsinks to verify clearances. - 4
Check power requirements and connectors
Verify the motherboard’s power connector(s) match your PSU. Ensure CPU power and PCIe power cables are present and sufficient for planned GPUs or accessories.
Tip: If upgrading to a more powerful GPU, ensure PSU headroom to prevent boot or stability problems. - 5
Review BIOS version and update plan
If using a newer CPU, confirm BIOS support. If needed, plan a BIOS update using a supported older CPU first or vendor recovery method.
Tip: Back up current BIOS settings before updating and note any required reset steps. - 6
Inspect cooling compatibility
Check CPU cooler height and fan clearance around RAM modules and tall VRM heatsinks. Ensure adequate airflow for thermals.
Tip: Measure clearance and consider alternative coolers if space is tight. - 7
Double-check vendor resources
Consult the motherboard’s official product page, memory QVL, and firmware notes. These sources minimize compatibility ambiguity.
Tip: Keep a record of model numbers and revision codes for future reference. - 8
Validate with a dry build
Before final assembly, perform a dry boot with minimal components to confirm POST without a full hardware load. Address any issues early.
Tip: If POST fails, recheck all power and RAM seating before reattempting.
Questions & Answers
What does motherboard compatibility include?
It includes socket compatibility, RAM type, PCIe slots, power supply connectors, and form factor alignment. Verifying these reduces post-purchase problems.
It includes socket, RAM, PCIe slots, power, and form factor alignment. This helps prevent surprises after you build.
Can BIOS updates fix CPU compatibility?
Sometimes BIOS updates add support for newer CPUs, but not always. Always check the vendor’s guidance before buying.
Sometimes BIOS updates add CPU support, but not always. Check the vendor guidance first.
Is RAM compatibility the most important?
RAM type, speed, and voltage must match the motherboard specs; otherwise the system may fail to boot or rununstably.
RAM compatibility is critical; mismatches can prevent booting or cause instability.
How do I know if a motherboard fits my case?
Check that the motherboard form factor matches the case (ATX, microATX, ITX) and that mounting holes align with the case standoffs.
Make sure the board size matches your case and the mounting points line up.
What if my GPU blocks PCIe slots?
Examine slot spacing and clearance with the CPU cooler. Some boards may share bandwidth or restrict slots when a large GPU is installed.
Check spacing and clearance; large GPUs can block other slots.
Are used motherboards safe to buy?
Used boards can have degraded components or BIOS issues. Buy from reputable sources and inspect physically if possible.
Used boards can be risky; buy from trusted sellers and inspect before buying.
Watch Video
Highlights
- Identify socket and chipset first
- Verify RAM type, speed, and capacity
- Confirm case form factor fits
- Check PSU connectors and power requirements
- Update BIOS if necessary