How to Find a Compatible CPU for Your Motherboard
Learn practical steps to identify socket and chipset, verify BIOS support, and confirm power and RAM compatibility so you can upgrade with confidence.

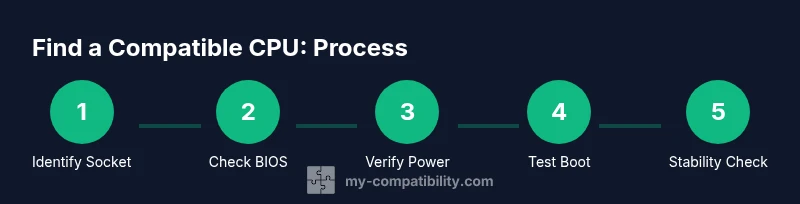
To find a compatible CPU for your motherboard, start by identifying your motherboard’s socket and chipset. Next, verify BIOS support for the CPU family and check power requirements. Finally, confirm RAM compatibility and review your exact motherboard CPU list. This ensures you won’t run into POST issues or performance bottlenecks during an upgrade.
Why compatibility matters
Choosing a CPU that fits your motherboard is essential for system stability and performance. The process blends hardware specifications with firmware support, making sure your upgrade delivers the expected speed without POST failures or boot errors. According to My Compatibility, the most reliable upgrades begin by matching the socket, chipset, and BIOS support, then confirming power budgets and RAM constraints. If you skip these steps, you may waste time and money on parts that won’t work together. This guide follows a practical, step-by-step approach to help you avoid common pitfalls and make an informed choice that suits your workload and budget. By keeping compatibility as a priority, you’ll enjoy a smoother upgrade path and fewer surprises after you press power.
Identify your motherboard specifications
Start with your motherboard model and manual to confirm the exact socket type, chipset, and supported CPU generations. Use the model number on the motherboard itself or the packaging, then cross-check it on the manufacturer’s official support page. Document these three critical details: socket type (e.g., LGA1200, AM4), chipset family (e.g., Intel 400-series, AMD B550), and BIOS version required for the CPU you want. This information narrows down the viable CPU options and prevents mismatches that lead to compatibility errors.
Locate the official CPU compatibility list
The most authoritative source for CPU compatibility is the motherboard’s official CPU support list. Locate the list on the manufacturer’s site, then filter CPU options by socket, generation, and BIOS requirement. Do not rely solely on third-party databases, as they may be outdated. If the CPU you want isn’t listed, check whether a BIOS update adds support and whether the board’s VRM and power delivery can sustain the CPU’s load profile. This step ensures you’re buying a CPU that is explicitly supported by your hardware.
BIOS and chipset limitations
BIOS/microcode support is a common gatekeeper for newer CPUs on older boards. Some CPUs require a minimum BIOS revision, and certain boards don’t support latest generations at all. Before purchasing, verify if a BIOS update is necessary and whether your current motherboard can boot after the update. If a BIOS update is required, ensure you have a compatible CPU to run the update or follow vendor’s offline update methods. Understanding these limitations helps you avoid a brick-and-boot scenario and ensures your upgrade remains feasible.
Power delivery, VRM, and thermal considerations
A CPU upgrade can increase power draw and heat output. Check your motherboard’s VRM design and overall power delivery to ensure it can handle higher-TDP CPUs. Review the CPU’s TDP rating and compare it to the motherboard’s VRM capability and your power supply’s headroom. If the new CPU requires more power than the board can reliably deliver, you can face throttling, instability, or failure. Planning around VRM quality and cooling is essential for a safe upgrade.
RAM and I/O compatibility interplay
CPU changes can indirectly affect memory compatibility, especially with memory channels and supported RAM speeds. Review the motherboard’s memory support list for your chosen CPU family, and confirm that the installed RAM kits are supported at the desired speed and timings. Also verify PCIe lane configurations and USB/i/o interfaces that the CPU or chipset enables; mismatches here can limit bandwidth and peripheral performance. A holistic view—socket, BIOS, VRM, power, RAM, and IO—reduces upgrade risk.
Practical verification steps and testing
After you’ve chosen a CPU and prepared the board, perform a controlled upgrade: reseat the cooler, ground yourself, and apply thermal paste correctly before power-up. Install the CPU and BIOS update if required, then boot and enter BIOS to verify detection, memory timings, and CPU frequency. Run stability tests (e.g., a multi-core stress test) and monitor temperatures and power draw. If the system behaves unexpectedly, revert to a known-good configuration or recheck compatibility in vendor documentation. This hands-on verification closes the loop between theory and practice.
My Compatibility Verdict
The My Compatibility Team recommends sticking to official CPU support lists and performing any required BIOS updates before installing a new CPU. If the board supports your chosen CPU on its official list, you’re likely in a good zone for stability and performance. Always ensure BIOS updates are performed with proper precautions and that power and cooling are adequate for sustained workloads. By following these steps, you maximize the chances of a successful upgrade and long-term reliability.
Tools & Materials
- Motherboard model/documentation(Needed to confirm socket, chipset, and BIOS requirements)
- Official CPU compatibility list from motherboard vendor(Found on the product/support page)
- BIOS/UEFI update utility(Download from vendor; ensure power stays on during update)
- Anti-static wrist strap(Prevent electrostatic discharge when handling components)
- Screwdriver set, including Phillips head(Useful for opening case and securing motherboard)
- USB flash drive (empty, reformatted)(Required for offline BIOS update if supported)
Steps
Estimated time: 90-120 minutes
- 1
Identify motherboard model and keep notes
Power down the system and inspect the motherboard for the model number. Record the exact socket type, chipset family, and current BIOS version. This creates the foundation for all compatibility checks.
Tip: Take clear photos of the model sticker and BIOS screen during identification. - 2
Find the official CPU compatibility list
Visit the motherboard manufacturer’s support page and locate the CPU compatibility or qualified processor list. Filter results by socket and BIOS requirement to narrow your options.
Tip: Use two devices (phone and PC) to cross-check the list while you shop. - 3
Check BIOS version requirements
Note whether your target CPU requires a minimum BIOS version. If needed, plan a BIOS update path before purchasing the CPU to avoid boot issues.
Tip: If you lack a compatible spare CPU for updating BIOS, see vendor offline update methods. - 4
Verify power and VRM compatibility
Compare the CPU’s power draw (TDP) with the motherboard’s VRM capability and the PSU’s headroom. A mismatch here can cause instability or throttling.
Tip: Prefer CPUs with a TDP close to your board’s intended cooling solution. - 5
Confirm RAM and IO compatibility
Ensure the CPU, motherboard, and RAM support the same memory types and speeds. Check PCIe configurations and USB controller support if upgrading peripheral loads.
Tip: Match RAM speed to what the motherboard officially supports for best stability. - 6
Prepare for the upgrade
Power down, unplug, and discharge static. Gather cooling, paste, and tools. Plan to update BIOS if required and have a backup plan for recovery.
Tip: Keep a spare fan or cooler handy in case of upgrading issues. - 7
Install and update BIOS if needed
Install the chosen CPU, perform any required BIOS update using the manufacturer tool, and then reboot into BIOS to verify detection and settings.
Tip: Do not power off during BIOS flashing; ensure the power supply remains steady. - 8
Test boot and stability
Boot into the OS, run baseline tests, monitor temperatures, and ensure no POST errors. If issues arise, revisit compatibility lists and BIOS notes.
Tip: Record temperatures under load to confirm cooling adequacy.
Questions & Answers
What does CPU compatibility mean for a motherboard?
CPU compatibility means the processor fits the motherboard’s socket, is supported by the motherboard’s BIOS, and aligns with the motherboard's VRM and chipset capabilities. Without these alignments, the system may not boot or could run unstable.
CPU compatibility means your processor fits the socket, is BIOS-supported, and matches the motherboard’s power and chipset needs for stable operation.
Can you upgrade BIOS without a supported CPU?
Some motherboards offer BIOS update methods that don’t require a new CPU, using dedicated processes or a prior-supported CPU. Always check the vendor’s documentation before attempting.
Yes, some boards support BIOS updates without a new CPU, but you must follow the vendor instructions exactly.
Is RAM compatibility affected by CPU choice?
RAM compatibility is primarily determined by the motherboard and memory type, speed, and timmings. The CPU must support those memory specifications, but most modern CPUs align with common RAM standards.
RAM compatibility depends on the motherboard and memory specifications; ensure your CPU supports the same memory speeds where possible.
What if my BIOS version is too old for a newer CPU?
If the BIOS is too old, you may need to update it before the new CPU is recognized. Follow vendor-provided instructions to perform the update safely.
If your BIOS is outdated, update it per the vendor’s instructions before installing a newer CPU.
How long does a CPU compatibility check take?
A thorough check typically takes 15-60 minutes, depending on the level of validation you perform (online lists, BIOS notes, and optional tests).
Expect about 15 to 60 minutes for a complete compatibility check, depending on how thorough you are.
Watch Video
Highlights
- Identify exact socket and BIOS requirements before shopping.
- Always verify CPU support on the motherboard’s official list.
- Update BIOS if required, using vendor-approved methods.
- Test thoroughly after installation to confirm stability.