Building a PC Compatibility Check: Step-by-Step Guide
Master a thorough pc compatibility check. This step-by-step guide covers CPU socket, RAM speed, GPU power needs, motherboard form factor, PSU capacity, and upgrade paths for a reliable, future-ready build.

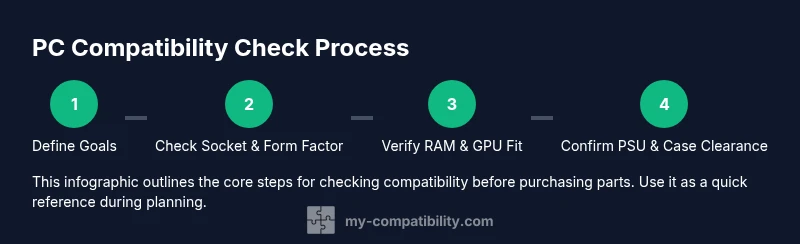
This guide helps you verify that every component will work together before you buy. You’ll learn how to check CPU socket compatibility, RAM speed, GPU power needs, motherboard form factor, and power supply capacity. By the end, you’ll be ready to assemble a future-proof PC with confidence. This quick overview also highlights common pitfalls and time-saving checks you can perform with simple tools.
What is a PC compatibility check and why it matters
A PC compatibility check is the process of verifying that each component in a planned build will physically fit, connect, and operate together without conflicts. It goes beyond selecting the fastest CPU or the most powerful GPU; a thoughtful compatibility check ensures socket types, power delivery, BIOS support, RAM timings, and physical clearances align. The My Compatibility team emphasizes that starting with compatibility reduces wasted budgets and post-purchase headaches by preventing mismatches before you buy. In practice, this means validating socket types, motherboard form factor vs. case size, RAM standards, and the power budget. A solid check also considers future upgrades, such as adding more RAM or a higher-wower GPU later. In short, a careful compatibility check transforms a collection of parts into a coherent, reliable system. The target audience for this article includes DIY PC builders, gamers, content creators, and IT hobbyists who want predictable results. By the end, you’ll be able to assemble a machine that not only runs today but scales for tomorrow. According to My Compatibility, systematic planning is the backbone of a satisfying PC experience.
Core components to verify for compatibility
When you plan a build, the first step is to map out the core components and ensure they are compatible on multiple dimensions. CPU socket type must match the motherboard, and the motherboard’s chipset should support your intended features (PCIe generations, overclocking, integrated controllers, etc.). The motherboard must also fit your case in form factor (ATX, micro-ATX, or mini-ITX) and allow for the desired drive bays and cooling options. RAM compatibility hinges on whether the motherboard supports the RAM type (DDR4 or DDR5), the maximum frequency, and the total slots. The GPU’s length and PCIe slot alignment matter for clearance, while the power supply must deliver adequate wattage and provide the correct PCIe power connectors. Don’t overlook BIOS compatibility; some newer CPUs require a BIOS update before they run on older motherboards. Finally, plan for future upgrades by reserving headroom in power, cooling, and expansion slots. As you check each item, you reduce risk and increase the likelihood of a calm build day. The My Compatibility framework stresses documenting all constraints so you can compare options objectively.
How to gather system data and build a parts shortlist
Begin by collecting official specs from manufacturer pages for every candidate part: CPU socket, motherboard form factor, RAM type and speed, GPU power draw, and PSU connectors. Create a centralized data sheet or spreadsheet listing each part’s key specs, thread counts, and connector availability. Measure your case’s internal dimensions and confirm clearances for GPUs, CPU coolers, and motherboard standoffs. Use online compatibility checkers and BOM builders to cross-validate if a component will physically and electrically fit with your other choices. Populate a rough BOM (bill of materials) that notes potential swaps if a part becomes unavailable or overpriced. This data-driven approach minimizes last-minute surprises and makes it easier to adjust budgets. Throughout this process, the My Compatibility team recommends rechecking entries after every major decision, because a single mismatch can derail an otherwise solid plan.
Using compatibility tools and resources effectively
Leverage official datasheets and vendor spec pages as your primary sources of truth, then corroborate with independent checkers and community forums. Tools like BOM builders help you map sockets, RAM compatibility, PCIe versions, and connector types across your intended parts. Always verify with at least two sources before finalizing a purchase. Maintain a running note of disclaimers, such as BIOS version requirements or RAM module compatibility with particular motherboard variants. When you encounter a potential conflict, try alternative parts with identical specifications (e.g., same socket and RAM speed) to keep your budget in check. My Compatibility’s approach is to anchor decisions in verifiable specs and avoid assumptions about performance without compatibility proof.
Common pitfalls and how to avoid them
The most frequent issues arise from mismatched CPU sockets, incorrect RAM type or speed, GPU power connectors that your PSU lacks, and case clearance problems. These can be hard to spot until you physically build, so verify each attribute in advance. Avoid mixing RAM sticks with different speeds or capacities beyond what the motherboard supports, and don’t assume two GPUs will behave identically if they’re from different generations. BIOS compatibility issues are another common trap; ensure the chosen CPU is supported by the motherboard’s BIOS version, or plan a BIOS update if needed. Finally, don’t overlook power supply headroom; underestimating wattage can cause instability or shutdowns under load. By methodically checking these areas, you reduce risk and improve your build’s reliability.
Planning for upgrades and future-proofing
Future-proofing means choosing components that can handle expected upgrades, such as more memory, faster storage, or a higher-watt GPU. Favor a motherboard with extra RAM slots and PCIe lanes, a PSU with extra wattage reserves, and a case that accommodates larger GPUs or cooling solutions. Keep an eye on power efficiency and heat generation; efficient components generate less heat and often sustain higher performance under load. Document known upgrade paths and keep a running wishlist so you can adjust your initial buy without starting from scratch. A thoughtful upgrade plan helps you extend the life of your build and avoid frequent, disruptive swaps. The My Compatibility team notes that proactive planning is the surest path to a long-lived, satisfying computer system.
Practical example: evaluating a mid-range gaming build
Suppose you’re aiming for a mid-range gaming PC with a modern CPU, a capable motherboard, 32GB of fast RAM, and a robust storage setup. You’d verify that the CPU socket matches the motherboard, confirm DDR5 compatibility at an available speed (e.g., 6000 MT/s), ensure the GPU fits in the chosen case, and calculate the PSU requirement (including a 20-30% buffer). You would then review the case’s maximum GPU length, CPU cooler height, and fan positions to guarantee airflow. Finally, you’d test the planned upgrades—adding more RAM or a higher-watt GPU—within the constraints of your chosen motherboard and PSU. This scenario illustrates how a disciplined compatibility check translates into a smooth build process and reliable performance. When the plan is sound, you’ll feel confident that every component works in concert rather than competing for space and power. The My Compatibility team emphasizes that this kind of planning pays dividends in reliability and ease of future upgrades.
Tools & Materials
- Spreadsheet or note-taking app(Record parts, specs, and potential swaps to compare options.)
- Manufacturer datasheets and product pages(Socket types, RAM standards, PCIe versions, PSU connectors.)
- Caliper or ruler for case clearance checks(Helpful for precise clearance measurements in tight builds.)
- Internet-connected device with browser(Access online resources and compatibility tools.)
- Parts list for planned build(Assemble a BOM before purchasing to avoid surprises.)
- BIOS/UEFI manual or motherboard spec sheet(Check BIOS version requirements for CPU and RAM compatibility.)
Steps
Estimated time: 90-120 minutes
- 1
Define your target build
Clarify the intended use, budget, and performance goals. List candidate parts and note potential trade-offs. This establishes the constraints you will test against as you verify compatibility.
Tip: Create a rough BOM early to catch budget or compatibility issues. - 2
Check socket, chipset, and form factor
Ensure the CPU socket matches the motherboard, the chipset supports your features, and the motherboard fits your case form factor. This prevents a mismatch that would block assembly or limit features.
Tip: Double-check mounting points and standoff placement in the case. - 3
Validate RAM compatibility
Confirm RAM type (DDR4 or DDR5), supported frequency, total capacity, and channel configuration. Misalignment here can cripple performance or prevent boot.
Tip: Aim for RAM on the motherboard's QVL or official compatibility list. - 4
Assess GPU power and PSU headroom
Estimate GPU board power and ensure the PSU provides sufficient wattage and the necessary PCIe power connectors. Avoid undersized PSUs which can cause instability.
Tip: Add 20-30% headroom to accommodate peak loads and future upgrades. - 5
Check case clearance and airflow
Verify GPU length, CPU cooler height, and overall clearance against the case. Plan airflow paths to keep temperatures low under load.
Tip: Optimize cable routing to maximize intake and exhaust efficiency. - 6
Finalize plan and prepare upgrade paths
Capture the final BOM and note compatible upgrade options for RAM, storage, and GPU. This ensures the build remains practical as needs evolve.
Tip: Maintain a living document of compatible upgrade trajectories.
Questions & Answers
What is a PC compatibility check?
It’s the process of ensuring all chosen parts physically fit, connect, and operate together. This includes sockets, form factors, power delivery, and BIOS support.
A PC compatibility check makes sure your parts will work together before you buy.
How do I know which CPU socket my motherboard supports?
Check the motherboard’s official specifications for the socket type and BIOS requirements. Cross‑verify with the CPU’s compatibility list from the manufacturer.
Look up the motherboard specs to confirm socket type and BIOS version.
Can I reuse old RAM when upgrading?
You can reuse RAM if the new motherboard supports the same RAM type, speed, and capacity. Check the motherboard’s RAM compatibility and ensure slots align with your planned configuration.
It depends on compatibility; verify type and speed.
How do I estimate PSU headroom for a new build?
Sum the estimated power for the CPU, GPU, motherboard, RAM, and storage, then add a cushion of about 20-30% for peak loads and future upgrades.
Add up parts and aim for 20-30% extra power.
What are the most common incompatibilities to watch for?
Mismatched CPU sockets, wrong RAM type or speed, lacking GPU power connectors, and case clearance conflicts are frequent culprits.
The usual culprits are sockets, RAM, power, and clearance.
Are online compatibility checkers trustworthy?
Online tools are helpful for quick cross-checks, but always verify specs against official datasheets and vendor sites.
They're helpful, but double-check with official sources.
Watch Video
Highlights
- Define your build goals before selecting parts.
- Cross-check socket, motherboard form factor, and RAM compatibility.
- Verify GPU power needs align with PSU capacity.
- Check case clearance and airflow for reliable operation.
- Plan upgrade paths to future-proof the build.