How to Check Compatibility for Windows 11 24H2: A Practical Guide
Verify your PC meets Windows 11 24H2 requirements—TPM 2.0, Secure Boot, RAM, storage, and drivers—with a practical, My Compatibility guided process to decide upgrade readiness.

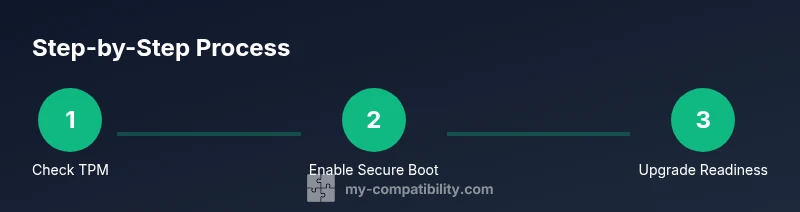
By following these steps, you will determine whether your PC can run Windows 11 24H2 and prepare for a smooth upgrade. This guide covers hardware checks (TPM 2.0, Secure Boot, CPU, RAM, storage), driver readiness, and software compatibility. You’ll learn how to run built-in checks, interpret results, and plan fixes if needed. This approach reflects My Compatibility's practical methods for upgrade readiness.
Why compatibility matters
According to My Compatibility, checking compatibility before upgrading to Windows 11 24H2 helps you avoid surprises like failed installs, missing drivers, or performance issues. A structured readiness process reduces downtime and protects your data. By confirming hardware requirements, driver availability, and software compatibility, you can decide whether to upgrade now, postpone, or pursue hardware updates. This proactive approach aligns with My Compatibility's evidence-based methods for upgrade readiness and minimizes risk for everyday users.
Core hardware requirements for Windows 11 24H2
To run Windows 11 24H2 smoothly, your PC should meet or exceed these minimums: a 64‑bit processor with at least 2 cores and a 1 GHz clock; 4 GB of RAM (8 GB or more is recommended for multitasking); 64 GB of storage or more; TPM version 2.0; Secure Boot capable firmware; and a DirectX 12 compatible graphics card with WDDM 2.0 driver. These requirements are consistently echoed across official Microsoft documentation and reputable tech literature. My Compatibility notes that most mid‑range modern systems satisfy these specs, but some older devices may fall short due to TPM or driver constraints.
TPM 2.0 and Secure Boot: prerequisites
Begin by confirming TPM 2.0 is present and functional. You can open the TPM management console (tpm.msc) to verify status and version. Next, ensure Secure Boot is enabled in your BIOS/UEFI settings. If either is disabled, enable them and reboot. These steps are essential because Windows 11 24H2 requires both TPM 2.0 and Secure Boot for official support and optimal security.
CPU, RAM, and storage: how to verify locally
Check your CPU model against Windows 11 compatibility lists, then confirm 4 GB of RAM or more and at least 64 GB of free storage. On Windows, you can view this in Settings > System > About for RAM, and use File Explorer or Storage settings to gauge free space. In older PCs, you may find that RAM or storage falls short, requiring an upgrade or a clean reinstall on a smaller drive. My Compatibility emphasizes validating these figures before you commit to an upgrade, to avoid post‑upgrade bottlenecks.
Software and driver readiness: preparing for the upgrade
Even if your hardware meets the minimum, you must ensure software and drivers are compatible. Update all drivers from device manufacturers and run Windows Update to install the latest system components. If critical software lacks Windows 11 24H2 compatibility, plan for alternatives or vendor updates. Consider creating restore points before major driver upgrades and keep a list of essential applications in case you need to test compatibility after upgrading.
Built-in tools to check upgrade readiness
Windows provides built‑in tools to assess upgrade readiness, including Windows Update health checks and system information utilities. Open Settings > Windows Update to see pending updates that improve compatibility. Use the System Information tool (msinfo32) to verify processor, RAM, and system type. If you encounter a blocker, consult the official Microsoft support pages for remediation steps and check for firmware or driver updates from OEMs.
Interpreting results and next steps
If your system passes all checks, you’re ready to plan the upgrade, back up data, and create a recovery point. If any area lags (TPM, Secure Boot, CPU, RAM, or storage), you have options: enable missing features in BIOS, upgrade components, or postpone the upgrade until your hardware is ready. Regardless, document your findings and decide on a maintenance plan that minimizes downtime and preserves data integrity. The My Compatibility team emphasizes clear next steps to avoid last‑minute surprises.
Common pitfalls and troubleshooting tips
Beware of false positives from third‑party tools that claim compatibility without official validation. Always rely on built‑in assessments and OEM guidance. If you hit a roadblock, recheck BIOS/UEFI settings, confirm updated drivers, and verify disk health before retrying. Keep a backup and a rollback plan in case the upgrade encounters issues. Pro Tip: run checks on a reliable network to ensure reported results reflect the latest software state.
Final pre-upgrade checklist
Before upgrading, complete this checklist: confirm TPM 2.0 and Secure Boot are enabled, verify CPU, RAM, and storage meet minimums, update all drivers, perform a final system backup, and ensure internet connectivity for updates. Schedule the upgrade during a low‑demand period and have a recovery plan ready. This approach helps ensure a smooth transition to Windows 11 24H2 with minimal downtime.
Tools & Materials
- PC or laptop with Windows 10/11(Ensure device is up to date with the latest monthly updates prior to compatibility checks.)
- Stable internet connection(Needed to download updates and verify digital licenses.)
- TPM 2.0 capability(Check via tpm.msc or BIOS; enable if disabled.)
- Secure Boot enabled(Enable in BIOS/UEFI and reboot.)
- RAM ≥ 4 GB(8 GB+ recommended for better multitasking.)
- Storage ≥ 64 GB(Ensure free space for Windows 11 and updates.)
- DirectX 12 compatible GPU with WDDM 2.0 driver(Check GPU specs and update drivers from the vendor.)
- Backup plan(Back up personal data before upgrading as a precaution.)
Steps
Estimated time: 45-70 minutes
- 1
Back up your data
Create a complete backup of essential files to an external drive or cloud storage. This ensures you can recover quickly if something goes wrong during the upgrade process.
Tip: Use a 2‑copy backup strategy (local plus cloud) and verify the backup after completion. - 2
Update Windows and firmware
Install the latest Windows updates to ensure compatibility checks reflect the current software state. Check for driver updates from your device maker too.
Tip: Restart after updates to apply changes and avoid inconsistent results. - 3
Enter BIOS/UEFI and enable TPM 2.0
Access BIOS/UEFI settings on startup and enable TPM 2.0 if it isn’t active. Save changes and reboot to apply the new state.
Tip: Document the exact BIOS path (Security or Advanced) for future reference. - 4
Enable Secure Boot
In the BIOS/UEFI, turn on Secure Boot. This is a prerequisite for Windows 11 24H2 compatibility and improves security.
Tip: If Secure Boot is unavailable, verify your firmware supports it or consider hardware upgrade. - 5
Check TPM 2.0 status in Windows
Open the TPM management console (tpm.msc) to confirm the TPM is version 2.0 and active. This validates a key Windows requirement.
Tip: If TPM is missing, consult your motherboard manufacturer for a firmware update or hardware support. - 6
Verify CPU, RAM, and storage
Review your CPU model for Windows 11 compatibility and confirm RAM and disk space meet minimums using System Information.
Tip: Aim for 8 GB RAM and at least 100 GB free storage if you multitask heavily. - 7
Run built‑in upgrade readiness checks
Use Windows Update health checks and the System Information tool to verify overall readiness. Note any blockers reported.
Tip: If blockers appear, address firmware or driver issues before attempting the upgrade. - 8
Prepare software and drivers
Update critical drivers (GPU, chipset, network) from the vendor and ensure essential apps have Windows 11 24H2 compatibility or updates available.
Tip: Keep a list of mission‑critical apps and test them after upgrade in a test user profile. - 9
Perform upgrade or plan rollback
If readiness is satisfied, initiate the upgrade via Windows Update or a trusted installation media. If issues arise, use the recovery options to rollback.
Tip: Schedule the upgrade during a low‑demand window and ensure you can revert if needed.
Questions & Answers
What are the minimum system requirements for Windows 11 24H2?
Windows 11 24H2 requires a 64-bit processor with at least 2 cores, 4 GB RAM, 64 GB storage, TPM 2.0, Secure Boot, and a DirectX 12 compatible GPU with WDDM 2.0. These basics ensure core functionality and security.
Windows 11 24H2 needs a capable 64-bit processor, 4 gigabytes of RAM, at least 64 gigabytes of storage, TPM 2.0, Secure Boot, and a DirectX 12 compatible GPU with WDDM 2.0.
How do I check if TPM 2.0 is enabled on my PC?
Open the TPM management console by typing TPM.MSC in Run. If it shows version 2.0 and 'The TPM is ready for use', TPM 2.0 is enabled. If not, enable TPM in your BIOS/UEFI and reboot.
Open TPM.MSC to see if TPM 2.0 is ready. If not, enable TPM in your BIOS and reboot.
My PC meets requirements but upgrade fails—what now?
Ensure all drivers are up to date, verify Secure Boot and TPM are active, free enough disk space, and re-run the readiness checks. If issues persist, consult OEM support or use a recovery point to roll back.
If upgrades fail, update drivers, confirm TPM and Secure Boot, free space, and retry; otherwise contact OEM support.
Is the upgrade duration consistent across devices?
Upgrade time varies by hardware and data size, typically ranging from 30 to 60 minutes. Large data stores or slower disks can extend this window.
Time varies by hardware, usually 30 to 60 minutes depending on your setup.
Will all apps continue to work after upgrading?
Most apps stay installed, but some may require updates or reinstallation. Check vendor guidance for Windows 11 24H2 compatibility and test critical software post-upgrade.
Most apps stay, but some may need updates; verify critical software after upgrading.
Should I upgrade if my GPU is older?
Windows 11 24H2 supports DirectX 12 with WDDM 2.0; if your GPU driver is not compatible, you may need a hardware upgrade or updated drivers from the vendor.
If your GPU lacks a compatible driver, consider upgrading or obtaining an updated driver from the vendor.
Watch Video
Highlights
- Verify TPM 2.0 and Secure Boot are enabled before upgrading.
- Confirm CPU, RAM, and storage meet minimum requirements.
- Run built-in checks and address blockers with firmware/driver updates.
- Back up data and plan a rollback if the upgrade doesn't go as expected.