What SSD Is Compatible With My Laptop: A Guide
Learn how to determine SSD compatibility for laptops, including form factors, interfaces, and step-by-step upgrade guidance to improve performance safely.

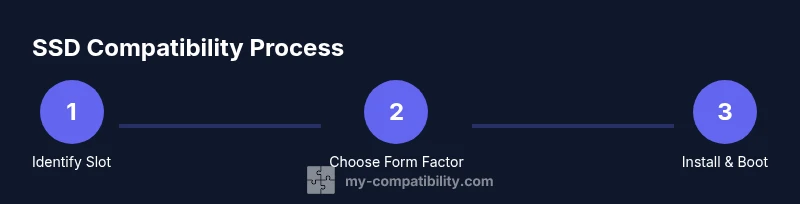
To determine what type of SSD is compatible with my laptop, identify the form factor (2.5-inch SATA, M.2) and the interface your device supports. Check the laptop’s manual or BIOS/UEFI settings, then verify available drive bays and screw types. In short, match form factor and interface, then ensure BIOS recognizes the drive.
What matters: SSD types and why it matters
If you're asking what type of ssd is compatible with my laptop, the short answer is that you must match both the form factor and the interface. The form factor is the physical size and shape of the drive, and the interface is how the drive talks to the motherboard. In laptops, the most common options are 2.5-inch SATA SSDs and M.2 solid-state drives (M.2 NVMe or M.2 SATA). Many modern laptops include an M.2 slot, but older or budget models may rely on a 2.5-inch drive or even eMMC storage. Understanding the difference helps prevent wasted purchases and failed upgrades. This guide provides a practical checklist you can follow before buying or swapping drives. According to My Compatibility, taking a methodical approach yields reliable results.
Laptop specs you need to check
Before you shop, collect your laptop’s essential storage details. Start with the exact model number and, if possible, the service manual. Look up whether the notebook has an M.2 slot, a 2.5-inch bay, or both. Check the BIOS/UEFI for boot options and storage configuration. Note any warranty implications or service caveats. You don’t need to disassemble the laptop just to read the specs—manufacturer pages and community forums often summarize the key storage capabilities for common models. My Compatibility analysis, 2026, emphasizes building a checklist from official specs to avoid compatibility surprises.
Form factors and interfaces explained
SSD form factors come in several shapes and sizes, but the two most relevant for laptops are 2.5-inch SATA and M.2 (with or without NVMe). A 2.5-inch SATA SSD uses the SATA interface and fits into a standard laptop drive bay with a bracket or mounting screws. M.2 drives are small cards that plug directly into an M.2 slot on the motherboard. M.2 drives can be NVMe (PCIe) for high-speed performance or SATA-based, depending on the slot. The key clues are the slot type (M.2 vs 2.5-inch) and the support in BIOS for NVMe or SATA. Always confirm the laptop’s slot type and supported protocols before buying.
How to read your laptop's labels and motherboard markings
If you’re unsure which slot your laptop provides, look for labelling on the underside or inside the back panel. The slot may be labeled "M.2" or show a physical size like 2242, 2260, or 2280. If you can access the motherboard, you may see written ridges or screws indicating where a drive would mount. Use your laptop’s maintenance manual or a trusted teardown guide to verify the exact form factors supported. Do not force-fit a drive into a slot that isn’t designed for it, as misalignment can damage pins. This step reduces the risk of buying the wrong SSD.
NVMe vs SATA in real-world scenarios
NVMe SSDs, delivered via PCIe, offer the highest performance you’ll commonly see in laptops, but they require a compatible slot and BIOS support. SATA SSDs, including 2.5-inch SATA drives and some M.2 SATA modules, are typically more affordable and widely compatible but won’t match NVMe speeds. If you have a modern ultrabook or gaming laptop, NVMe is usually the better choice, provided the system supports it. In some budget or older models, only SATA options will be available. The goal is to choose the drive that aligns with your slot type and performance needs without overpaying for features your system can’t use.
Practical upgrade scenarios by laptop category
Entry-level laptops often support only a 2.5-inch SATA SSD or a basic M.2 slot with limited bandwidth. Mid-range devices frequently offer NVMe-enabled M.2 slots, giving a noticeable performance uplift for boot times and file transfers. Business-class machines often prioritize reliability and endurance, with both NVMe and SATA options in some models. Gaming laptops usually feature fast NVMe storage options and sometimes a second SSD bay for RAID configurations or additional capacity. When in doubt, consult the model’s official storage specification page and upgrade forums for model-specific guidance.
Data migration and performance expectations
Before swapping drives, plan how you’ll migrate your OS and personal data. Cloning software or a clean OS reinstall are common paths; a clone minimizes downtime, while a fresh install can improve performance and reliability. Expect detectable improvements in boot times, application launch, and file transfer speeds when moving from a HDD or older SSD to a modern SSD, especially NVMe. To maintain longevity, ensure you monitor temperatures and firmware updates after the upgrade.
Troubleshooting compatibility issues
If your laptop doesn’t recognize the new drive after installation, recheck the form factor and interface fit, reseat the connector, and confirm BIOS settings recognize the storage device. Some laptops require a BIOS/UEFI update to enable NVMe support or to recognize a brand-new M.2 module. If you encounter power or thermal issues, inspect heatsinking and ensure you’ve installed any required standoffs or spacers. In persistent cases, revert to the original configuration and consult manufacturer support.
Planning your upgrade: budget, warranty, and environment
Set a budget by balancing capacity, speed, and reliability. NVMe drives cost more per gigabyte but deliver the best performance, while SATA drives offer solid value for everyday use. Consider the warranty terms and whether the upgrade affects your device’s warranty. Use anti-static precautions and a clean workspace to avoid damage. Choose a reputable brand and verify the drive’s firmware is current before installation.
Tools & Materials
- Precision screwdriver set(PH0/PZ0 or Torx T5/6 depending on laptop model; include small magnetic screwdriver.)
- Anti-static wrist strap(Ground yourself to prevent static damage to components.)
- New SSD (2.5-inch SATA or M.2 NVMe/SATA)(Confirm the form factor and interface before purchase.)
- Replacement mounting screws(Some laptops use a dedicated screw for M.2 or the 2.5-inch drive bracket.)
- External USB-to-SATA adapter (optional)(Helpful for cloning or data transfer if you’re not installing internally right away.)
- Thermal pad or adhesive (optional)(Only needed for certain open-frame SSDs or if the heat environment is critical.)
Steps
Estimated time: 60-90 minutes
- 1
Power down and unplug
Shut down the laptop completely, unplug the charger, and remove external devices. If possible, disconnect the battery to minimize the risk of short circuits. This initial safety step reduces electrical risk while you work.
Tip: Use the anti-static wrist strap to ground yourself before touching any internal components. - 2
Open the back panel
Place the laptop on a clean surface and remove the back panel screws in an organized way. Keep track of screw sizes and lengths. Gently lift the panel to expose the internal housing and storage area.
Tip: If a panel resists, don’t force it; check for hidden screws or clips and consult the service manual. - 3
Locate the storage slot
Find the storage slot on the motherboard: it will be labeled M.2 or a 2.5-inch bay with a connector. Confirm whether you have an available slot or if you must replace an existing drive.
Tip: Take a photo of the current layout before removing anything to help with reassembly. - 4
Insert the SSD
For M.2: insert the SSD at a slight angle into the slot, then press flat and align the mounting hole with the screw standoff. For 2.5-inch: slide into the bay and align connectors.
Tip: Do not use excessive force; if it won’t seat, remove and reinsert to ensure proper alignment. - 5
Secure the drive
Secure the SSD with the appropriate screw or bracket. Ensure the drive lies flat and does not press against other components.
Tip: If you’re using a 2.5-inch drive, verify the drive bracket is properly installed to avoid movement. - 6
Reassemble and boot
Snap the back panel in place, replace screws, reconnect power, and boot the laptop. Enter BIOS/UEFI to confirm the drive is detected, then follow OS prompts to format or initialize the new SSD.
Tip: If the drive isn’t detected in BIOS, re-seat the drive and check cable connections if applicable. - 7
Clone or reinstall OS
Clone your existing drive to the new SSD if you want a seamless transition, or perform a fresh OS install for a cleaner setup. After installation, reinstall drivers and applications as needed.
Tip: Use reliable cloning software and verify the clone succeeded before wiping the old disk.
Questions & Answers
Can I mix NVMe and SATA drives in the same laptop?
It depends on the laptop's storage controller and slots. Some machines support only one type, while others allow a mix if there are separate bays or slots. Always verify the system's official specs before attempting mixed configurations.
Some laptops support only one type of SSD in a single slot, so check the official specs before mixing NVMe and SATA drives.
Will upgrading the SSD void my warranty?
Upgrading an SSD can affect warranty terms if the modification caused damage. Many manufacturers allow user upgrades, but it’s best to review the warranty policy and follow the official service guidelines.
Most warranties allow user upgrades if you follow the official guidelines, but check your policy.
How do I know if my BIOS supports NVMe?
Look for NVMe or PCIe in the BIOS storage settings. If unclear, check the laptop’s support page or firmware release notes for NVMe support.
Check the BIOS storage settings for NVMe or PCIe; if unsure, consult the support page.
What’s the best way to migrate data to a new SSD?
Cloning software can migrate your OS and apps, leaving data intact. Alternatively, a clean OS reinstall can improve performance, especially if the old drive was slow.
Cloning helps preserve your setup; a fresh install can boost longevity and performance.
What if there’s no compatible slot on my laptop?
If there’s no internal slot, consider external USB SSD solutions for portable storage or evaluate a professional upgrade path if a serviceable option exists.
If there’s no slot, external storage is a practical alternative.
How should I format the new drive for first use?
After installation, initialize the drive in your OS’s disk management tool or reinstallation wizard. Choose an appropriate file system and partition layout for best compatibility.
Initialize and format the drive in the operating system during setup.
Watch Video
Highlights
- Match form factor and interface before buying.
- Check BIOS/UEFI for NVMe or SATA support.
- Follow safe, organized steps to install the SSD.
- Clone OS if you want a quick transition; otherwise reinstall.
- Keep warranty and model constraints in mind when upgrading.