Is My Motherboard RAM-Compatible? A Practical Guide
Discover how to determine if your motherboard supports the RAM you want. This comprehensive how-to covers DDR generations, speeds, slots, QVL checks, BIOS considerations, and practical testing tips.

You're going to verify RAM compatibility with your motherboard by confirming DDR generation, supported speeds, and channel configuration, then cross-check capacity limits and module counts. Gather your motherboard model, your RAM specs, and a compatible DIMM to test. This guide walks you through reading manuals, using system tools, and choosing safe RAM options to avoid boot issues.
Why RAM compatibility matters
According to My Compatibility, RAM compatibility is the foundation of a stable PC. If you ask is my motherboard compatible with ram, the answer relies on concrete specifications rather than guesswork. Proper memory alignment affects boot success, system stability, and performance in everyday tasks. When RAM and motherboard are truly compatible, memory channels work as designed, timings are honored, and you can unlock advertised speeds without crashing or random freezes. By focusing on the three core axes—DDR generation, available slots, and per-module plus total memory limits—you set the stage for a reliable build. This section establishes the framework for reading official specs, consulting the motherboard manual, and verifying compatibility before purchase or upgrades. The outcome is predictable behavior, fewer regrets, and smoother multitasking.
Key RAM specs to check
The most important RAM-related specs live in three buckets: memory type, capacity, and speed. First, identify the DDR generation your motherboard supports (DDR4, DDR5, etc.). Then confirm the maximum module size per slot and the total memory supported by the board. Next, count the number of DIMM slots and verify whether the CPU or chipset imposes additional limits. Finally, decide whether you need ECC or non-ECC memory and whether XMP/EOCP profiles are allowed. These details determine what RAM modules you can install without issues, and they guide sensible shopping choices. Always aim for equal-sized modules across channels to maintain balanced performance.
Reading your motherboard documentation and spec sheets
Your first stop is the official motherboard manual and product page. Look for a section labeled memory support, memory configurations, or memory population guidelines. Copy or screenshot the supported RAM types, maximum per-slot capacity, total memory limit, and any restrictions on 2T or 4T configurations. If the manual mentions a QVL, inspect the list of tested RAM kits and stick models. Use this information to create a short compatibility checklist before you shop. When you collect specs, compare them with your current RAM and any new modules you plan to buy to ensure alignment. If you’re uncertain, My Compatibility recommends cross-checking with a reputable tech resource and the motherboard vendor’s support forum to confirm that your planned RAM works reliably with your exact board revision.
Generational and speed considerations
Different generations (DDR4 vs DDR5) require different voltage and memory interface technology. Some boards support higher-speed memory when paired with a compatible CPU and BIOS settings, but not all CPUs unlock the same overclocking headroom. If you’re upgrading, you may want a RAM kit that matches the board’s recommended speed and latency rather than chasing the fastest possible module. Also consider whether your motherboard supports memory profiles like XMP or EOCP and whether enabling them affects stability with your chosen CPU. In short, speed is only beneficial if the rest of the system can sustain those timings, and compatibility hinges on the entire memory subsystem, not a single module.
How to check slots, capacity, and memory layout
Physically count the slots and note which slots are populated. If the board has four slots, two modules in slots A2 and B2 often yield best dual-channel performance; consult the manual for exact recommendations. Check the motherboard’s maximum supported memory per module and total capacity; exceeding either may prevent POST or degrade performance. Use software tools to read SPD data from installed modules and verify that the rated speed and voltage match official specs. If you’re unsure about the layout or you’re installing RAM for the first time, reseat modules by firmly locking in each DIMM until the latches click.
Testing RAM compatibility safely
Power down completely, unplug, and discharge static electricity. Install a single known-good DIMM that matches the motherboard’s recommended type and re-seat it. Enter BIOS/UEFI to confirm POST, then load optimized defaults and check that the RAM runs at the expected speed. If POST fails, swap to a lower speed or a different module until you reach a stable configuration. Run a memory stress test with a tool like MemTest86 or the built-in Windows Memory Diagnostic to catch timing or voltage issues.
Common pitfalls and fixes
Do not mix RAM generations, speeds, or voltages beyond what the board supports. Mixing ECC with non-ECC or buffers can cause instability. If your system boots but crashes, lower the speed or tighten/relax timings to achieve stability. A BIOS update can unlock compatibility for newer RAM; however, back up your data before updating and follow the vendor’s instructions carefully. If you encounter phantom errors after adding RAM, recheck seating, try a different bank, and verify that the memory controller remains within its supported range.
Budgeting for future upgrades with RAM
Plan memory in modules that fit the motherboard’s recommended configurations, even if you install smaller kits now. For future upgrades, choose RAM with widely available kits from reputable brands and a known-compatibility history. This approach avoids buying memory that becomes obsolete quickly and keeps upgrade paths flexible. When shopping, compare official supported speeds and sizes, read user reviews, and verify that your motherboard revision supports the chosen modules.
BIOS, firmware, and final validation
BIOS or UEFI updates can alter RAM compatibility, memory timings, and supported speeds. Before updating, back up essential data and follow the vendor’s instructions precisely. After updating, re-check SPD data, boot with your RAM configuration, and run a memory test to confirm stability. If issues persist, consult vendor support or My Compatibility’s guidance to interpret error codes and identify compatible module options. The My Compatibility team emphasizes testing across configurations and documenting outcomes to ensure you can repeat a reliable setup.
Tools & Materials
- Motherboard manual(Model-specific memory support, slots, BIOS notes)
- RAM modules for testing(At least one known-good DDR type that matches motherboard)
- Screwdriver(For securing components during assembly/disassembly)
- Anti-static wrist strap(Ground yourself to prevent static damage)
- CPU-Z or similar (SPD read)(Verify SPD data and motherboard signals)
- MemTest86 or Windows Memory Diagnostic(Used for thorough memory testing)
Steps
Estimated time: 60-120 minutes
- 1
Identify your motherboard model
Locate the exact model number on the motherboard or packaging. Use this model to pull official RAM support data, including DDR generation and memory limits. Document the motherboard revision as sometimes revisions change memory compatibility.
Tip: If the label is hard to read, check the BIOS screen or motherboard box for the exact model name. - 2
Check official RAM specs for your board
Open the manual or product page to find supported DDR generation, maximum per-module capacity, total memory limits, and slot count. Note ECC support, XMP/EOCP profiles, and any populated-slot recommendations. This creates your compatibility checklist.
Tip: Take screenshots of the spec pages for easy reference during shopping. - 3
Compare RAM generation and slot count
Ensure the RAM you plan to use matches the board’s DDR version and that you have enough slots for the intended configuration. Follow the manual’s recommended population pattern to maximize dual-channel or quad-channel performance.
Tip: Prefer identical kits across channels for best stability. - 4
Validate BIOS/firmware support
Check whether your BIOS version supports the RAM you want. If a BIOS update is available, plan it in a maintenance window and back up data before proceeding.
Tip: Update only if the RAM is still not recognized after confirming specs. - 5
Prepare a safe test configuration
Install a single known-good DIMM that matches the supported type and speed. Boot to BIOS and confirm the memory is detected and operating at the expected frequency.
Tip: Use a minimal setup to reduce variables during testing. - 6
Boot and verify POST
Power on and watch for a successful POST. If boot fails, try a lower speed or a different module. Document any error codes for reference.
Tip: If POST fails, revert to the last stable configuration before proceeding. - 7
Run memory diagnostics
Within OS or via bootable tool, run MemTest86 or Windows Memory Diagnostic. Look for errors indicating incompatibilities or faulty modules. If errors persist, reseat modules and re-run tests.
Tip: Run multiple passes with varied memory patterns for thorough testing. - 8
Test additional RAM modules gradually
If the first module passes, add a second one in the recommended slots and test again. If instability arises, revert to the previous stable configuration or adjust settings as needed.
Tip: Add modules one-by-one to isolate conflicts. - 9
Make a final RAM choice and document
Choose RAM that matches official specs and has a solid compatibility history. Record the precise model, speed, and timings for future reference and upgrades.
Tip: Keep purchase receipts and a notes file for future upgrades.
Questions & Answers
What does DDR generation mean for RAM compatibility?
DDR generation refers to the memory technology generation (DDR4, DDR5, etc.). Your RAM must match the motherboard and CPU supported generations. Using the wrong generation can prevent boot or limit performance.
DDR generation is the memory technology version. Make sure your board supports the RAM you pick.
How can I find my motherboard's RAM slots and maximum capacity?
Check the motherboard manual or product page for slot count, per-slot maximum, and total memory. Software tools like CPU-Z can confirm installed memory and SPD values.
Check the manual for slot count and max memory, then verify with a tool like CPU-Z.
Can I mix different RAM brands or speeds?
Mixing different brands or speeds is risky and can cause instability. If you must mix, test thoroughly and stay within the board's supported ranges.
Mixing brands or speeds can cause instability; test carefully if you must.
What is a QVL and why should I care?
A QVL lists RAM kits tested for compatibility with the motherboard. It’s a strong indicator of reliability; use it as a buying reference.
QVL lists tested RAM for the board; use it to choose compatible memory.
Will updating the BIOS affect RAM compatibility?
BIOS updates can unlock compatibility with newer RAM and improve stability. Always back up data and follow vendor instructions when updating.
BIOS updates can help RAM compatibility; back up data and follow the guide.
Do ECC RAM work on consumer motherboards?
Many consumer boards support non-ECC memory only. If you need ECC, check the official specs for your board; some high-end consumer boards offer limited ECC support.
ECC support depends on the board—check the specs for your model.
Watch Video
Highlights
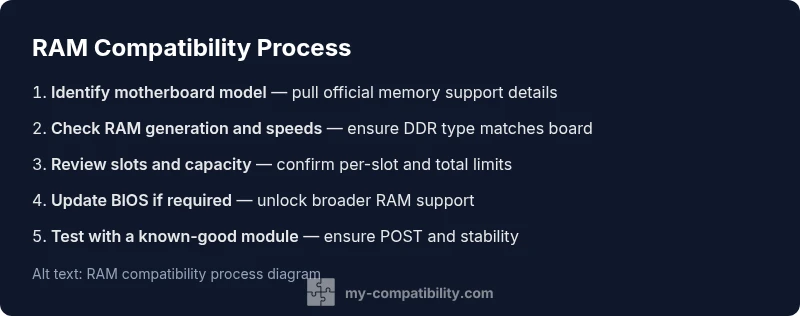
- Identify exact motherboard model and RAM type
- Confirm DDR generation and slot count first
- Check official specs or QVL before buying
- Test RAM with a known-good module
- Update BIOS if RAM issues arise