Cricket Wireless Compatibility Check: A Practical Guide
Learn how to verify if your device works with Cricket Wireless. This step-by-step guide covers network bands, SIM/eSIM readiness, activation tests, and troubleshooting to ensure a smooth switch.

Goal: determine if your device will work on Cricket Wireless. You’ll verify network compatibility, SIM/eSIM readiness, and activation steps. Start by identifying your device model, checking Cricket’s supported bands, and confirming SIM activation, then test voice, data, and messaging to confirm full functionality. If any service fails the test, note the issue and retry after updates. This approach helps avoid activation headaches and ensures a reliable Cricket experience.
Understanding Cricket Wireless Compatibility
When planning a move to Cricket Wireless, the most important question is whether your device will function on Cricket’s network. A thorough cricket wireless compatibility check helps you avoid activation headaches, unexpected charges, and post-switch service gaps. According to My Compatibility, a robust check combines device identification, network-band validation, and a live activation test using a Cricket SIM or eSIM. In practice, a well-executed check confirms which devices are straightforward to activate, which require firmware updates, and which simply aren’t compatible. This block outlines the core ideas behind compatibility and why it matters for reliable service, fast data, and clear calling.
How Cricket network bands influence device compatibility
Cricket Wireless relies on a specific set of network bands to deliver voice and data services. Not every smartphone supports the same bands, even within the same model family. The practical outcome is simple: if your device doesn’t support Cricket’s essential bands, you may experience limited data speeds, intermittent coverage, or disabled features. For a robust cricket wireless compatibility check, start by locating your device’s model number and the list of supported bands from the manufacturer or device settings. Then compare that list with Cricket’s official band map and notes about BYOP (bring your own phone) support. This comparison tells you upfront whether firmware updates, alternative SIM configurations, or a different device are needed.
Preparing your device: model, lock status, and SIM options
Before testing, collect essential information. Note your device model, its current carrier, whether it is SIM-locked, and the operating system version. A written reference of the device’s IMEI or MEID can help verify eligibility, but avoid sharing sensitive identifiers in public forums. If your phone is locked to another carrier, request an unlock before attempting activation. In most cases, Cricket will provision a SIM or eSIM and provide the proper APN settings. Having these items ready prevents delays and makes the rest of the process smoother.
Android vs iPhone: what to expect during a compatibility check
Android devices and iPhones differ in how they connect to Cricket’s network and how settings are managed. Android users should verify APN settings, ensure roaming is configured appropriately, and test data from multiple apps. iPhone users should confirm that iOS is up to date, carrier settings are refreshed after activation, and that messages and FaceTime work as expected. In both cases, a successful compatibility check includes a live test: a voice call, a text, and a data connection. This cross-platform approach minimizes surprises after switching.
Activation tests: what to test and how to interpret results
The activation test is the core of a cricket wireless compatibility check. Start by inserting the Cricket SIM or configuring the eSIM, then power cycle the device. Make a voice call to confirm dial tones and call quality, send a text message, and browse a short webpage to verify data connectivity. If any test fails, recheck the SIM tray, APN settings, and reboot. If problems persist, try the device on another Cricket-compatible SIM to rule out SIM issues, or contact Cricket Support for guidance. Document the results to track issues and resolutions.
Troubleshooting common issues and next steps
Common issues include unsupported bands, carrier locks, and missing carrier settings after a reset. For each issue, use a structured approach: confirm device model, confirm you’re using the correct SIM/eSIM, and verify settings. If data works but roaming is disabled, enable roaming or check regional coverage. If calls fail, re-test with a different SIM or reset network settings. If activation still fails, escalate to Cricket Support with your device model, IMEI/MEID, and a record of tests.
Quick-start checklist and resources
To speed up the cricket wireless compatibility check, keep a one-page checklist handy: device model, current carrier status, SIM/eSIM details, operating system version, and a test plan. Use Cricket’s official support pages and My Compatibility’s guides to verify band compatibility and activation steps. This section also lists trusted resources such as carrier band maps, device manufacturer pages, and community forums for known issues. Bookmark these resources for future device upgrades or changes.
Real-world scenarios and examples
Consider a user with an older iPhone who wants to switch from another carrier. They should first check whether the iPhone model is compatible with Cricket’s bands and whether the device is unlocked. If compatible, they complete the SIM activation and test voice and data; if not, they may upgrade or choose a different device. A second scenario involves an Android user with a BYOP device: confirm band support, verify APN settings, and test data on Cricket’s network. In both cases, accurate compatibility checks reduce post-switch support calls and disappointment.
Next steps: staying prepared and getting help
After performing a thorough cricket wireless compatibility check, you should be ready to activate or exchange devices confidently. If issues arise, Cricket Support is the primary resource, while My Compatibility offers guidance on what to verify before contacting support. Maintain a log of tests and configurations, and revisit the official band map whenever you upgrade or switch devices. The My Compatibility team recommends standardizing your check process so you can repeat it quickly for future devices.
Tools & Materials
- Device model and current carrier status(Identify exact model (e.g., iPhone 12 Pro, Galaxy S21) from Settings > About or Settings > System > About phone.)
- Cricket SIM or eSIM activation information(Have a Cricket plan or BYOP details ready for provisioning.)
- SIM tray ejector or paperclip(Needed to insert or adjust the SIM tray.)
- Official band map or manufacturer specs(Use the device’s bands list to compare with Cricket’s supported bands.)
- Carrier unlocking proof (if applicable)(If the device is locked to another carrier, obtain an unlock before testing.)
- APN settings reference sheet(Accessible from Cricket support pages or device settings guide.)
- Diagnostics checklist(A one-page board with test steps and expected outcomes.)
Steps
Estimated time: 20-40 minutes
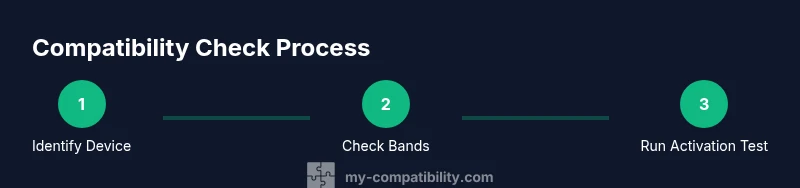
- 1
Identify device model and lock status
Locate the exact device model and check if the phone is carrier-locked. This establishes whether you can activate with Cricket immediately or need an unlock. Confirm the OS version to anticipate any software prerequisites.
Tip: Have your device settings open to quickly copy model name and OS version. - 2
Check network bands and compatibility
Compare your device’s supported bands with Cricket’s official band information. If the bands align, you’re closer to a successful activation; if not, plan alternatives or firmware updates as needed.
Tip: Use manufacturer pages or your device’s settings to locate band support. - 3
Prepare SIM/eSIM and activation plan
If you have a physical SIM, verify it’s the Cricket SIM; if you’re using eSIM, ensure the device supports eSIM and that the carrier plan is ready. Have APN guidance handy.
Tip: Double-check the correct SIM or eSIM profile is selected before activation. - 4
Insert SIM and reboot
Insert the Cricket SIM or configure the eSIM, then restart the device to refresh carrier settings. A clean reboot reduces activation errors.
Tip: If you’re unsure, redo the activation after a full power cycle. - 5
Run activation and basic tests
Attempt to activate and perform a voice call, text, and a quick data navigation to verify core services. Confirm that calls connect clearly and data loads a webpage.
Tip: Note any error messages and capture screenshots for support. - 6
Verify APN and network settings
If data or MMS fail, recheck APN settings and ensure roaming is enabled as appropriate for your region. Apply manufacturer-recommended defaults for Cricket.
Tip: Avoid manual changes unless you have the exact Cricket APN values. - 7
Troubleshoot or escalate
If issues persist, test the device with another Cricket-compatible SIM to rule out SIM problems, and contact Cricket Support with your test results and device details.
Tip: Provide IMEI/MEID, model, OS version, and a summary of tests when contacting support. - 8
Document and plan next steps
Keep a simple log of outcomes and next steps. Use this log for future checks or when moving to a new device.
Tip: A standardized checklist speeds up future activations.
Questions & Answers
What is a Cricket wireless compatibility check?
A compatibility check confirms whether your device can operate on Cricket’s network by validating supported bands, SIM/eSIM provisioning, and the ability to activate successfully.
A compatibility check confirms if a device can work on Cricket’s network by validating bands, SIM readiness, and activation capability.
Do I need to unlock my phone before checking compatibility?
If your device is locked to another carrier, unlocking is typically required to use Cricket’s SIM. Check with your current carrier for unlock eligibility and timing.
If the phone is carrier-locked, you’ll usually need to unlock it before using Cricket’s SIM.
Can I check compatibility online without a device?
Yes, you can use official tools and My Compatibility guides to verify model compatibility against Cricket’s network without performing a hardware test, though a live activation test is the final confirmation.
Yes, you can check online, but a live activation test is the best confirmation.
Does Cricket support eSIM?
Cricket supports eSIM on selected devices. Verify your specific model’s eSIM compatibility and follow Cricket’s provisioning steps if supported.
Cricket supports eSIM for certain devices; check device compatibility before choosing eSIM.
What should I do if activation fails after a check?
Review SIM/eSIM provisioning, verify APN and carrier settings, reboot, and try again. If issues persist, contact Cricket Support with device details and test results.
If activation fails, recheck SIM provisioning and settings, then contact Cricket Support with your device details.
How long does activation typically take after a successful check?
Activation usually completes within a short window after provisioning, but it can vary by device and network conditions. If issues persist, follow the troubleshooting steps and contact support.
Activation is usually quick after provisioning, but it may vary; contact support if delay occurs.
Watch Video
Highlights
- Verify device model matches Cricket bands.
- Test voice, data, and SMS with a live activation.
- Check SIM/eSIM readiness before activation.
- Document results and consult Cricket Support if issues arise.