Troubleshooting: compatible tpm cannot be found
Urgent troubleshooting guide for the error 'compatible tpm cannot be found'. Learn quick fixes, diagnostic flow, step-by-step actions, and tips to restore TPM detection, update firmware, and keep your system secure.

The most likely cause of 'compatible tpm cannot be found' is that TPM is disabled or not detected by the system. A quick fix is to enter the BIOS/UEFI and enable TPM (or PTT/firmware TPM), then verify TPM status in Windows and update firmware if needed. If the module is missing or faulty, reseating or replacing the TPM component resolves the issue. According to My Compatibility, hardware or firmware changes frequently trigger this error, so start at the BIOS and Windows checks before hardware replacements.
TPM 101: What this error means
TPM, or Trusted Platform Module, is a secure crypto processor built into many computers. When Windows or the motherboard cannot detect a TPM, you may see messages like “compatible tpm cannot be found.” This isn’t always a hardware failure; more often it’s a configuration or detection issue. TPM can be hardware-backed on modern motherboards, or firmware-based (PTT in Intel-speak). Understanding the difference helps you decide whether to enable, update, or reseat a component. My Compatibility’s research indicates most users resolve this by adjusting BIOS/UEFI settings and validating Windows sees the TPM via tpm.msc, not by rushing to replace parts.
Key takeaway: TPM must be both present and enabled, and Windows must be able to initialize it for services like BitLocker or Windows Hello. If you’re preparing a system for Windows 11, ensure TPM 2.0 support and Secure Boot readiness are satisfied.
Quick BIOS/UEFI checks for TPM visibility
Enter your BIOS/UEFI during boot (often by pressing Del, F2, or Esc). Locate security, privacy, or advanced settings and look for options named TPM, PTT, fTPM, or TPM2.0. If found, enable it and select the active mode (usually
Automatic
2.0
Discrete TPM
Firmware TPM
PTT
Discrete TPM 2.0
Intel PTT
AMD fTPM
Security Device Support
Intel Platform Trust Technology
DSDT
Security Chip
TPM2.0
Trusted Platform Module 2.0
TPM
PTT
MPTP
DTPM
AMD PSP
FTPM
Security Subsystem
IFE
AMT
No TPM
TPM II
TPM 2.0
TPM Enable
Disable/Enable TPM
SMBios TPM
AMT/AMT-C
Firmware TPM
MTPM
Platform Trust
Trusted Computing
HPC TPM
HW TPM
Security Processor
Trust
Security status
PSP
ASPM
Measured Boot
Secure Boot
BIOS Security
IOMMU
SGX
TPM 2.0
Security Chip Enable
TPM Power
Endless options
Enable TPM
Disable TPM
TPS
TWTP
TPM Device
Firmware Secure
Secure Device
Firmware Update
Security Feature
FTPM
DTPM
TPM (2.0)
Clear TPM
Initialize TPM
Reset TPM
PSP TPM
Discreet TPM
TPM State
Platform Trust Technology
Security Chip
TPM2.0
TPM Mode
Secure Module
Active TPM
Trusted Module
TPM Vendor
MCTP TPM
Modules
Device Security
TPM Status
Secure Device Support
TCG
PTT 2.0
DTPM Enable
Security Subsystem
TPM State Enabled
MeasBoot
Secure Launch
Steps
Estimated time: 30-60 minutes
- 1
Access BIOS/UEFI and locate TPM option
Restart the PC and enter BIOS/UEFI using the on-screen prompt. Navigate to the security or advanced settings to find TPM, PTT, or fTPM. If you find multiple options, choose the one corresponding to TPM 2.0 and set it to Enabled or Active.
Tip: If you’re unsure, consult the motherboard manual for exact labels and keyboard shortcuts. - 2
Enable TPM and save changes
Enable the TPM option and any related security features (e.g., Secure Boot, PTT). Save your changes and exit BIOS/UEFI. The system will reboot and attempt to re-detect the TPM.
Tip: Some systems require a reboot of two cycles to properly initialize TPM. - 3
Boot into Windows and verify TPM visibility
Once back in Windows, open the Run dialog, type tpm.msc, and press Enter. Look for TPM status and Specification Version. If TPM is not ready, proceed with driver and BIOS checks.
Tip: If tpm.msc shows 'The TPM is not ready for use' you may need to initialize or clear the TPM with caution. - 4
Update BIOS/firmware and chipset drivers
Visit the motherboard or system vendor site and download the latest BIOS/firmware and chipset drivers. Apply updates following the vendor’s instructions, then reboot and re-check TPM visibility.
Tip: Never interrupt a BIOS update; use a reliable power source and do not restart mid-update. - 5
Check for Windows policy conflicts
Ensure TPM is not disabled by a policy or security setting. Review local group policy under Computer Configuration > Administrative Templates > System > Trusted Platform Module (TPM) and related policies.
Tip: If you’re in a corporate environment, check with IT before changing policies. - 6
Hardware validation and escalation
If TPM still cannot be found, confirm with the motherboard vendor whether your model includes a TPM header or integrated TPM. It may require physical installation or replacement.
Tip: Document serial numbers and firmware versions to speed up support calls.
Diagnosis: System reports the TPM cannot be found after startup or after a BIOS reset.
Possible Causes
- highTPM is disabled in BIOS/UEFI
- mediumNo TPM module installed or the motherboard lacks TPM support
- mediumBIOS/firmware outdated or corrupted, causing TPM enumeration failure
- lowWindows policy or security settings blocking TPM initialization
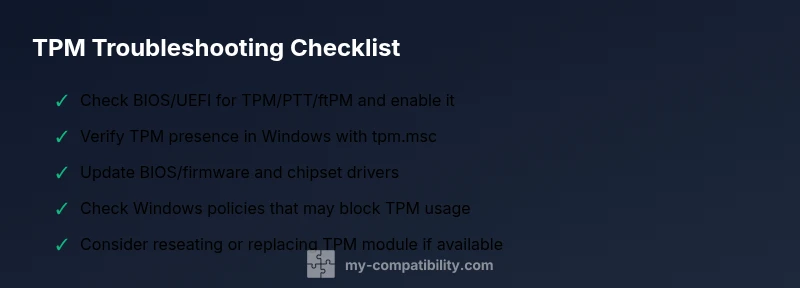
Fixes
- easyEnter BIOS/UEFI and enable TPM/PTT or firmware TPM, then save and restart
- mediumIf a TPM module exists, reseat or replace it according to the motherboard manual
- hardUpdate BIOS/firmware and chipset drivers to the latest version from the vendor
- easyRun TPM management (tpm.msc) and initialize TPM, then recheck seen status in Windows
- mediumCheck Windows security policies and group policy to allow TPM usage in devices and OS features
Questions & Answers
What does a 'compatible tpm cannot be found' error usually indicate?
It usually means the system cannot detect TPM hardware or firmware. This can be due to TPM being disabled in BIOS, the motherboard lacking TPM support, outdated firmware, or Windows policy blocking TPM usage. Start with BIOS settings and Windows verification before assuming hardware failure.
It typically means TPM isn’t detected. Check BIOS, then Windows, and only then consider firmware or policy changes.
How do I enable TPM in BIOS/UEFI?
Reboot the PC, enter BIOS/UEFI, locate the TPM/PTT/ftPM option under Security or Advanced, enable it, then save and exit. Some vendors label it as ''Security Device Support'' or ''TPM 2.0''. After enabling, Windows should detect TPM on reboot.
Go into BIOS, turn on TPM under Security, save, and reboot to check.
Is TPM required for Windows 11?
Yes. Windows 11 requires TPM 2.0 or equivalent hardware-based security. If TPM isn’t detected, you may not be able to install or upgrade to Windows 11 or enable certain security features.
Windows 11 needs TPM 2.0 or newer.
What if my motherboard has no TPM header?
Some boards offer firmware TPM (fTPM) instead of a discrete TPM module. If there is no physical header, rely on fTPM/PTT and Secure Boot settings in BIOS. If TPM still isn’t detected, contact the vendor for compatibility guidance.
If there’s no TPM header, use firmware TPM options in BIOS.
Can a TPM be replaced or repaired?
Physical TPM modules can sometimes be replaced or reseated, depending on the motherboard. If the TPM circuit is dead, replacing the motherboard or using a trusted hardware alternative may be necessary.
A failed TPM may require hardware replacement or motherboard service.
How can I verify TPM is working after enabling it?
Open tpm.msc in Windows to check status and Specification Version. Run BitLocker or Windows Hello to confirm that TPM is active for security features.
Check tpm.msc and run a security feature like BitLocker to confirm the TPM works.
Watch Video
Highlights
- Confirm TPM is enabled in BIOS/UEFI
- Verify TPM status in Windows with tpm.msc
- Update BIOS/firmware before hardware changes
- Not all systems have physical TPM modules
- Document steps if you need vendor support