How to Check Compatible RAM: A Step-by-Step Guide
Learn how to check RAM compatibility for your PC or laptop with a clear, step-by-step method, essential tools, and safety tips to upgrade memory confidently and avoid boot or stability issues.

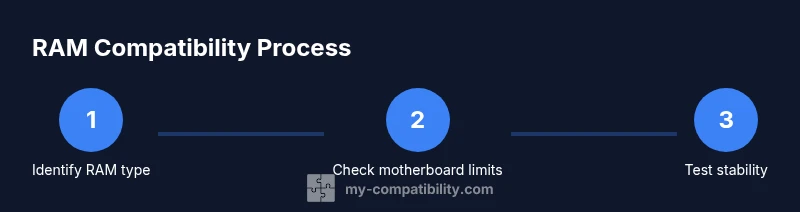
In this guide you will learn how to check compatible RAM for your PC or laptop. You'll identify RAM type (DDR4/DDR5), max capacity, speed, and dual/multi-channel configurations by consulting your motherboard manual, system info tools, and SPD data. The goal is a safe, stable memory upgrade without guesswork. This snapshot helps you plan upgrades, avoid boot errors, and ensure compatibility before buying.
Why RAM compatibility matters
RAM compatibility determines whether your system boots reliably, recognizes the full memory, and maintains stability under load. Installing RAM that is incompatible with the motherboard, CPU, or BIOS can cause boots to fail, system freezes, or data corruption. For a successful memory upgrade, you must match type (DDR4 vs DDR5), speed, capacity, and channel configuration to what the motherboard supports. According to My Compatibility, approaching RAM upgrades with a defined plan reduces post-purchase regret and helps you avoid wasted kits.
To get started, gather your system details, identify the exact RAM type your motherboard supports, and check the slots available. The aim of this guide is to teach how to check compatible ram without replacing the motherboard or CPU, and to provide a repeatable method you can use across many builds. We’ll combine official specifications with practical tests to confirm compatibility before you buy.
RAM basics you should know
RAM comes in different standards (DDR4, DDR5) and form factors (DIMM for desktops, SO-DIMM for laptops). The key compatibility factors are the RAM type, the voltage the motherboard expects, the maximum memory capacity in total and per slot, and the number of memory channels your motherboard supports. Memory speed and timings affect performance but only up to what the motherboard and CPU memory controller can handle. My Compatibility emphasizes that faster RAM is not always better if the system can’t utilize the extra speed. Understanding these fundamentals helps you avoid mismatched kits and wasted purchases. When planning, you’ll typically choose a RAM kit that matches the supported type, respects total capacity limits, and slots configuration.
Check your motherboard and CPU limits
Start with your motherboard manual or the manufacturer’s website to confirm supported RAM types, maximum total memory, per-slot limits, and the recommended memory configurations. The CPU’s memory controller also plays a role, especially on laptop platforms where thermal and power constraints can influence supported speeds. BIOS/UEFI can report detected memory and may offer profiles that set XMP/DOCP/EOCP memory performance automatically. By cross-checking the motherboard spec, CPU memory support, and any BIOS constraints, you minimize compatibility surprises. Remember to note the exact model number and revision of your motherboard for precise lookup.
RAM types, speeds, and timings to consider
Different RAM generations have different signaling and voltage requirements. DDR4 and DDR5 modules are not interchangeable, and even within a generation, not all speeds are supported by every motherboard. CAS latency (CL) and voltage influence stability and power consumption, but the most critical factor is whether the kit’s speed and timings are supported by the motherboard’s approved memory list. If you want a balanced approach, aim for a RAM kit that matches your motherboard’s tested configurations and leave room for future upgrades without exceeding the maximum per-slot limit.
How to read SPD data and identify slots
SPD (Serial Presence Detect) data is stored on each RAM module and describes its capabilities. Utilities like CPU-Z or HWInfo can read SPD and show the module type, size, speed, and timings. When examining an existing system, count the number of installed modules and available slots to plan upgrades. If you’re adding RAM to a system with open slots, select a kit that complements the existing modules in total capacity and speed to maintain dual-channel or quad-channel efficiency. My Compatibility analysis shows that aligning speeds and timings across modules reduces instability and boot problems.
How to choose the right kit and capacity
Capacity decisions depend on your workload and motherboard limits. For gaming and general use, 16–32 GB is typical for most modern rigs, with 8 GB being a minimum for lightweight tasks. For content creation or heavy multitasking, 32–64 GB might be appropriate. Don’t exceed the motherboard’s maximum total memory or per-slot limits, and try to pair modules of the same capacity and speed to preserve channel balance. The My Compatibility Team notes that sticking to a matched kit from a single brand often yields the best stability and simplest configuration.
Installation readiness: slots, seating, and BIOS settings
Power down, unplug, and discharge static before handling RAM. Open the case, locate memory slots, and orient modules so the notch aligns with the slot. Insert modules firmly until the latches click. If you have multiple slots, install in the recommended channels (often equal-colored slots) first. After hardware installation, boot into BIOS and enable XMP/DOCP if you’re using higher-speed memory, or set to the manual profile recommended by the RAM kit. Verifying these settings ensures the system recognizes the RAM correctly.
Testing RAM and validating stability
Boot into your OS and run a memory test tool like MemTest86 or Windows Memory Diagnostic. Let the test run for at least one pass (ideally longer) to check for errors. Monitor for crashes, blue screens, or unexpected reboots. If errors appear, reseat modules, try different slots, or reduce the speed to match stability. A successful test confirms that your RAM configuration is solid and ready for daily use. Ongoing stability testing is especially important after BIOS updates or significant changes to memory configuration.
Troubleshooting common issues
If your system fails to boot or reports memory errors, recheck module seating and compatibility with your motherboard’s QVL (Qualified Vendors List). Ensure you haven’t mixed modules with incompatible speeds or timings. Review BIOS memory settings and reset to defaults if overclocking profiles cause instability. If problems persist, test each module individually to identify a possible defective stick. These steps help isolate issues without replacing more hardware than necessary.
Quick post-install checks
After a successful RAM upgrade, verify in the operating system that the total memory matches expectations. Open Task Manager (Windows) or Activity Monitor (
Tools & Materials
- Motherboard manual(Contains supported RAM type, max capacity, and per-slot limits.)
- System information(Know current RAM type, speed, slots, and total capacity.)
- SPD-reading software(Tools like CPU-Z or HWInfo help read SPD data from RAM modules.)
- Test software(MemTest86 or Windows Memory Diagnostic to verify stability.)
- Anti-static mat or wrist strap(Reduces risk of ESD damage during installation.)
Steps
Estimated time: 60-90 minutes
- 1
Gather system information
Power down and unplug the computer, then collect the motherboard model, current RAM type, capacity, and number of slots. This establishes the baseline for compatibility checks.
Tip: Note the exact motherboard revision and BIOS version for precise lookups. - 2
Check motherboard RAM support
Consult the motherboard manual or manufacturer's site to confirm the supported RAM type (DDR4/DDR5), maximum total memory, and per-slot limits. This prevents selecting incompatible kits.
Tip: If the manual lists a QVL, prioritize kits on the list for best compatibility. - 3
Identify current RAM configuration
Open the case and count installed modules and slots, or use a system info tool to verify current channel configuration and occupancy.
Tip: Note which slots are in use to plan future dual- or quad-channel setups. - 4
Choose RAM type and capacity
Select a kit that matches the supported RAM type and total capacity within the per-slot limit. Prefer a matched kit from a single vendor to ensure coordinated timings.
Tip: Aim for a kit that balances total capacity with the system’s typical workload. - 5
Confirm speed and timings
Check the motherboard’s supported speeds and timings; if you enable XMP/DOCP, ensure the chosen RAM is rated for those profiles without exceeding voltage limits.
Tip: If stability is a concern, start with a conservative speed and test thoroughly. - 6
Install RAM modules
Power down, discharge static, and seat modules firmly in the correct slots with the notch oriented properly. Ensure clamps click into place.
Tip: Do not force modules; if they resist, recheck orientation and slot alignment. - 7
Power on and enter BIOS
Enter BIOS/UEFI and verify the memory is detected. If you’re using a higher speed, enable the appropriate profile (XMP/DOCP).
Tip: If BIOS reports instability, clear overclocking profiles and test with default timing. - 8
Test memory stability
Boot into the OS and run MemTest86 or Windows Memory Diagnostic to validate RAM stability over extended use.
Tip: Run tests for several passes and monitor for errors.
Questions & Answers
Can I mix RAM brands or kits?
Mixing brands can work, but it risks instability. Prefer matched kits with identical speeds and timings where possible.
Mixing RAM brands might work, but it's best to use matched kits to ensure stability.
Will faster RAM always improve performance?
Faster RAM can improve certain workloads, but gains depend on the CPU, motherboard, and software. If the system bottlenecks are elsewhere, speed gains may be minimal.
Faster RAM helps in some scenarios, but it isn’t a universal upgrade for every app.
How do I know if RAM is dual-channel?
Check motherboard manual or bios reports; install modules in matching color-coded slots to enable dual-channel operation.
Dual-channel requires the modules to be in the correct paired slots as per your motherboard.
What should I do if BIOS doesn’t recognize new RAM?
Reseat modules, clear CMOS, try different slots, and verify compatibility with the QVL. If unresolved, test each module individually.
If RAM isn’t detected, re-seat, test each module, and consult the QVL.
Is there a quick test to verify RAM health?
Yes—run MemTest86 or Windows Memory Diagnostic for several passes and monitor for errors or instabilities.
Run a memory test tool to verify RAM health after installation.
Highlights
- Match RAM type to motherboard (DDR4 vs DDR5).
- Respect motherboard max capacity per-slot and total.
- Install modules in the recommended slots for dual/quad-channel operation.
- Test stability with dedicated memory tests after installation.