How to Take Compatibility Mode Off Word
Learn how to take compatibility mode off Word with a clear, actionable guide. This step-by-step tutorial covers Windows and macOS, common issues, and best practices to ensure seamless formatting across Word versions.

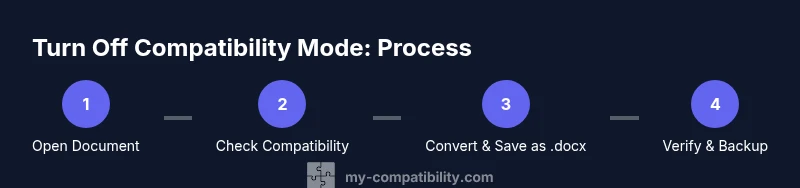
If you’re asking how to take compatibility mode off Word, you’re about to upgrade a document to the current Word format. Start by opening the file in Word, confirm it shows (Compatibility Mode), then click Convert under the Info tab and save as a new .docx. This removes compatibility mode and enables modern features.
Understanding compatibility mode in Word and why it matters
Compatibility mode in Word is a safety feature that preserves the appearance and behavior of documents created in older Word versions. It prevents certain newer features from being used and keeps formatting consistent with older software. According to My Compatibility, understanding this mode helps you decide when to modernize a document and how to avoid future formatting issues. In practice, taking compatibility mode off means converting the file to the latest Word format so you can access the full feature set, improve collaboration, and reduce cross-version surprises. This is especially important for teams that work across Word 2016, 2019, and Microsoft 365, where subtle formatting mismatches can derail project timelines.
Quick check: how to tell if your Word document is in compatibility mode
A document shows compatibility mode when Word preserves the original format from an older version. Look for a note in the title bar or a label in the File > Info pane indicating Compatibility Mode. If you see Convert or Update, you’re likely dealing with an older-format document. You should proactively verify the mode before sharing the file with others to avoid misalignment in margins, fonts, and styles. My Compatibility’s guidance helps you distinguish between documents that can be safely upgraded and those that require special handling due to legacy content.
Convert a document to current Word format (docx)
The simplest way to exit compatibility mode is to convert the file to Word’s current format. In Word, go to File > Info > Convert, then save the document as a new .docx file. Converting preserves content while unlocking new features such as improved collaboration, richer formatting options, and compatibility with latest templates. If Convert is unavailable, you may be dealing with a restricted file or a read-only source; in that case, save a copy after ensuring editing rights.
Save as Word Document (docx) vs older formats
Saving as a .docx file is the recommended approach for modern Word workflows. The .docx format supports advanced features, better cross-platform compatibility, and easier sharing within teams. Older formats like .doc may still be necessary for very old systems, but they limit modern features and can complicate version control. When you convert, consider keeping a backup of the original in case you need to reference legacy formatting or macros.
Step-by-step: Turn off compatibility mode in Word on Windows
If you’re using Windows, the process typically starts by opening the document, then checking for Compatibility Mode in the title bar or Info pane. Click Convert under File > Info to upgrade to the current format, then Save As a new .docx file. Reopen the new file and verify that the content, styles, and layouts render as intended. Finally, adjust any fonts or layout elements that changed during the conversion. Tip: Always keep a backup of the original file before converting to prevent data loss.
Step-by-step: Turn off compatibility mode in Word on macOS
On Mac, start by opening the document in Word, locating the Convert option under the File menu if available, and choosing to upgrade to the latest Word format. Save the upgraded document as a .docx file to ensure the change sticks. Reopen the new file to confirm that all content remains intact and formatting is stable. If you don’t see Convert, use Save As to create a new .docx and then close and reopen to confirm the upgrade.
Handling features that rely on compatibility mode
Some features, such as legacy macros or specific older templates, may require compatibility mode for correct behavior. If you upgrade, test macros and template-driven elements to ensure they function as expected. You may need to re-create or adjust certain styles to align with current Word standards. This is where My Compatibility’s best practices come in handy: document the changes and verify across devices to maintain consistency.
Common issues and troubleshooting after turning off compatibility mode
After upgrading, you may notice font substitutions, margin shifts, or layout changes. These can result from font availability, printer settings, or template differences. Check page layouts, re-apply styles, and confirm that tables, headers, and footers align with the new format. If problems persist, compare the original and upgraded documents to identify what changed and adjust accordingly.
Best practices for ongoing compatibility management
Create templates in the current Word format and standardize on .docx for all new documents. Use version control and cloud storage to compare changes across versions. Run a quick check for compatibility issues before sending documents externally, and document any deviations. Regularly update templates to reflect new Word features and avoid repeating the same compatibility issues across teams.
How to verify your changes across versions
To ensure consistency, test the upgraded document on different devices and Word builds. Open the .docx on Word for Windows, macOS, and, if applicable, Word Online to confirm that formatting remains intact. If you regularly exchange files with users on older Word versions, perform a secondary export to the older format (.doc) for compatibility checks and then adjust as needed.
Practical tips and checklists
- Always keep a backup before converting.
- Save as .docx and test on multiple platforms.
- Update styles and templates to the latest Word standards.
- Use the Check Document Compatibility feature to spot issues.
- Communicate version expectations with collaborators to minimize surprises.
Tools & Materials
- Microsoft Word (latest version) installed(Prefer the latest update for best compatibility handling)
- Backup copy (external drive or cloud storage)(Maintain a safe original before conversion)
- Access to a test device(Helpful to verify across platforms)
- Internet connection(Needed for online templates or updates)
Steps
Estimated time: 15-25 minutes
- 1
Open the document in Word
Launch Word and load the file you suspect is in compatibility mode. This is the first checkpoint to determine whether upgrading is needed.
Tip: If the file is on a network drive, copy it locally first to avoid disruptions. - 2
Check for Compatibility Mode indicator
Look at the title bar or the File > Info panel to confirm whether the document is in compatibility mode. This step informs your conversion plan.
Tip: If you see (Compatibility Mode), proceed with upgrading. - 3
Convert to the latest Word format
Under File > Info, select Convert to upgrade the document to the current Word format. This enables new features and improves interoperability.
Tip: If Convert isn’t visible, the document may already be in the latest format or be restricted. - 4
Save as a new .docx file
Choose Save As and select Word Document (.docx) to preserve the upgraded version separately from the original.
Tip: Give the file a clear name like ProjectName_v2.docx. - 5
Reopen and verify the upgraded document
Close and reopen the new .docx to ensure all content and formatting render correctly after the upgrade.
Tip: Check headers, footers, and page breaks for shifts. - 6
Test key features (styles, macros, templates)
If your document relied on older styles or macros, test them in the upgraded file to confirm they behave as expected.
Tip: You may need to re-create complex styles for full compatibility. - 7
Set default save format for future projects
Adjust Word's default Save As format to .docx to prevent reversion and ensure consistency.
Tip: This reduces future compatibility issues across teams.
Questions & Answers
What is compatibility mode in Word and why should I turn it off?
Compatibility mode preserves the look of older Word documents by restricting newer features. Turning it off upgrades the file to the current Word format, allowing access to newer tools and improved collaboration.
Compatibility mode keeps old formatting. Upgrading lets you use new Word features and share without version issues.
Can I revert after upgrading a document from compatibility mode?
Once a document is converted and saved as .docx, you can reopen the original .doc or a backup to compare, but you cannot revert changes within the same file without reconstructing the older format.
You can compare with the original backup, but reverting in the same file isn’t straightforward.
What if Convert is greyed out in Word?
If Convert is unavailable, the file may already be in the latest format or be blocked by permissions. Try Save As to create a new .docx, or check file permissions and read-only status.
If Convert isn’t clickable, try saving a new copy as .docx and retry.
Will upgrading affect macros or templates?
Upgrading can affect some macros or legacy templates. After upgrading, test macros and styles; you may need to update or recreate them for full compatibility.
Macros and templates may need updates after upgrading.
Should I share both the original and upgraded files?
Sharing both can be useful for teams that need to reference legacy formatting, but provide the upgraded .docx as the working version to avoid confusion.
Offer both if needed, but give the upgraded version as the primary working file.
How can I verify cross-version compatibility quickly?
Use Word’s Check Document Compatibility feature and test on multiple Word builds to ensure formatting remains consistent.
Run a compatibility check and test on multiple Word versions.
Watch Video
Highlights
- Upgrade when possible to unlock modern Word features.
- Always save upgraded documents as .docx for best compatibility.
- Test formatting and features after conversion to catch issues early.
- Keep backups and standardized templates to minimize future problems.
- Communicate version expectations with collaborators to avoid surprises.