How to Build a Compatible PC: A Step-by-Step Guide
Learn how to plan, select, and assemble a compatible PC build across CPU, motherboard, RAM, GPU, and PSU. Practical steps, checks, and common pitfalls for a reliable, upgradeable system.

By following this guide, you will learn how to plan and assemble a fully compatible PC build that matches your performance goals and budget. You’ll verify CPU socket compatibility, motherboard chipset, RAM speed, GPU power needs, and PSU capacity, while ensuring BIOS support and future upgrade paths. The result is a stable, upgradable system you can customize confidently.
Why a Compatible PC Build Matters
Building a PC isn't just about chasing the latest parts; it's about ensuring they work together reliably. A compatible PC build reduces POST failures, boot issues, driver conflicts, and wasted time reconfiguring settings after assembly. According to My Compatibility, the biggest reliability gains come from matching CPU socket to motherboard, RAM type and speed to motherboard specifications, GPU power with adequate PSU headroom, and BIOS support for chosen CPUs. A thoughtful compatibility plan also supports future upgrades, better resale value, and a smoother OS install path. In practice, this means starting with a clear target: identify the software you run most, the games or applications you expect, and any size or form-factor constraints. With goals in hand, you can select a motherboard that supports your CPU, a memory kit that aligns with the motherboard’s QVL, and a power supply that leaves room for a future GPU or additional drives. This upfront alignment saves money and avoids late-stage compatibility headaches.
What Compatibility Means in Practice
In PCs, compatibility means that every part can physically fit, can communicate correctly, and can run the intended software without conflict. It covers socket types, chipset support, RAM generation and speed, storage interfaces, power connectors, and firmware support. Practically, this translates to choosing a motherboard that supports your CPU and RAM speed, ensuring your GPU can draw enough power from the PSU, and confirming that the case supports the motherboard form factor and GPU length. When all these factors align, you gain a smoother build process and a system that runs as expected out of the box. The My Compatibility team emphasizes that compatibility is about interaction, not just individual performance.
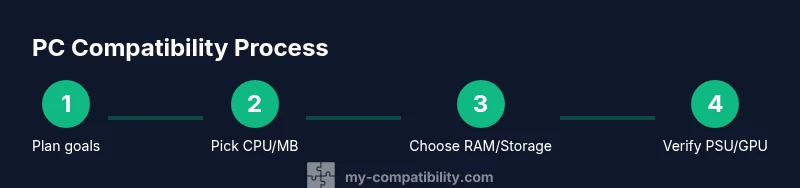
Planning Your Build: Core Compatibility Rules
Begin by defining your performance goals and constraints. Then apply these core rules:
- CPU + motherboard: Confirm the CPU socket matches the motherboard, and check that the BIOS supports your CPU out of the box or that a BIOS update is available.
- RAM: Choose DDR generation supported by the motherboard (DDR4 vs DDR5), and pick a speed within the CPU/motherboard tolerance; avoid mixing modules outside the supported range.
- Storage: Decide NVMe vs SATA, confirm motherboard slots, and ensure your case has enough drive bays or mounting space.
- Power and cooling: Select a PSU with adequate wattage and the necessary PCIe connectors; ensure the case has cooling capacity for the GPU and CPU cooler.
- Form factor: Make sure the motherboard size fits the case and that there is clearance for graphics cards, CPU cooler height, and cable routing.
My Compatibility analysis shows that the biggest risks come from mismatched sockets, RAM generation, and PSU connectors. Planning with these criteria early prevents dead-on-arrival builds and simplifies troubleshooting.
Component Compatibility Deep Dive
| Component | Compatibility factors | Common pitfalls | | --- | --- | --- | | CPU | Socket type, BIOS version, chipset features | Buying a CPU not supported by the motherboard; missing BIOS update | | Motherboard | Form factor, RAM type, PCIe lanes | Case incompatibility, insufficient slots, wrong PCIe version | | RAM | DDR generation, speed, capacity | Mixing speeds or exceeding motherboard QVL; insufficient capacity for multitasking | | GPU | PCIe version, length, power connectors | GPU longer than case; insufficient PSU connectors or wattage | | Storage | Interface (NVMe, SATA), slots, cooling | Too few NVMe slots; not enabling AHCI/RAID properly | | PSU | Wattage, connectors, efficiency | Underpowered PSU; missing PCIe cables |
Example Build Scenarios: Budget, Mid-Range, and High-End
- Budget: Focus on a balanced CPU/motherboard pairing with 16GB RAM and a budget NVMe SSD. Choose a power supply with enough headroom for a mid-range GPU and one or two additional drives. This path prioritizes reliability and upgrade potential over peak speeds.
- Mid-Range: Target solid 1080p or 1440p gaming and capable multitasking. Include 16–32GB RAM, a fast NVMe drive, and a GPU that delivers consistent frame rates without overreaching the PSU. Expect smoother performance across modern workloads.
- High-End: For 4K gaming or heavy content creation, select a CPU with strong multi-core performance, 32–64GB RAM, a high-end GPU, and substantial NVMe storage. Ensure the case and cooling can handle sustained loads and that the PSU has ample headroom for future upgrades.
My Compatibility analysis shows that careful budgeting and component matching dramatically improves stability and upgrade paths across all tiers.
BIOS, Firmware, and Software Compatibility Essentials
BIOS/UEFI compatibility is essential when mixing newer CPUs with older motherboards. Check for the latest BIOS revision before installation and confirm CPU microcode support. Enable XMP profiles only after confirming RAM compatibility with the motherboard’s QVL. For software, ensure your OS version supports the hardware and install the latest drivers for the GPU, chipset, and storage devices. Keeping firmware up to date helps avoid performance bottlenecks and security vulnerabilities. If you’re building a system for demanding software, consider enabling appropriate motherboard features (PCIe bifurcation, storage modes, and power management) to maximize efficiency and stability.
Common Pitfalls and How to Avoid Them
- Mismatched CPU socket and motherboard: double-check the exact socket and BIOS support. - RAM incompatibilities: stick to the motherboard’s supported memory list and avoid mixing generations. - Inadequate PSU headroom: plan for peak loads and future upgrades rather than current needs alone. - Case clearance issues: verify GPU length and CPU cooler height against your chosen case. - Cooling bottlenecks: ensure adequate airflow for sustained workloads and avoid throttling.
Build and Test: From Assembly to Stability
Start with a clean workspace and an ESD-safe setup. Install the motherboard in the case, mount the CPU cooler, attach memory, and install storage. Connect the power supply to the motherboard, CPU, and GPU, then perform a POST to confirm basic operation. If you see any error codes, consult the motherboard manual and verify hardware seating. Once POST is successful, boot to a live OS or installer, check device recognition, enable XMP, install drivers, and run basic stress tests to validate stability. Document each change you make to simplify future upgrades.
Next Steps: Upgrades and Maintenance
After a successful build, plan for future expansions by reserving PCIe slots, memory capacity, and storage bays. Regularly update BIOS/firmware and drivers as new features arrive. Create a maintenance checklist for dust cleaning, thermal monitoring, and component aging. By staying proactive and using a compatibility-first mindset, your PC will remain reliable and easy to upgrade as software demands evolve. The My Compatibility team recommends keeping a simple upgrade roadmap to avoid bottlenecks.
Tools & Materials
- Screwdriver set (Phillips #2)(Magnetic tip recommended for tiny screws)
- Anti-static wrist strap(Prevent static discharge)
- Thermal paste(Only if CPU cooler paste is not pre-applied)
- Cable ties and zip ties(For neat cable management)
- Thermal monitoring software (OS)(For initial stability tests)
Steps
Estimated time: 90-120 minutes
- 1
Define goals and constraints
Identify intended use, target performance, power budget, case form factor, and future upgrade plans. This clarifies the compatibility requirements you will enforce when selecting components.
Tip: Write a short checklist of must-have features to keep during procurement. - 2
Pair CPU and motherboard
Confirm socket type and chipset compatibility. Check BIOS support for your CPU and plan for a potential BIOS update if needed.
Tip: If you’re unsure about BIOS readiness, choose a motherboard with easy one-time BIOS flash back. - 3
Select RAM and storage
Pick RAM generation (DDR4 vs DDR5) and speed within motherboard tolerance. Choose NVMe for speed or SATA for cost savings and ensure slots meet future storage needs.
Tip: Aim for RAM speed within the CPU/motherboard sweet spot to avoid bottlenecks. - 4
Choose GPU and PSU with headroom
Estimate peak system power and select a PSU with adequate wattage and the required PCIe connectors. Verify GPU length fits the case and that cooling is sufficient.
Tip: Don’t undersize the PSU—headroom matters for long-term stability. - 5
Check case compatibility and cooling
Ensure the motherboard form factor fits the case and there is clearance for GPU, cooler, and cable routing. Plan airflow paths and fan placement.
Tip: Use the motherboard and case manuals to confirm mounting points before assembly. - 6
Assemble the system
Mount the CPU, apply thermal paste if needed, install RAM, mount storage, and secure the motherboard in the case. Connect power and data cables with clean routing.
Tip: Attach 2-3 longer cables first to keep routing tidy. - 7
Boot and test POST
Power on and verify POST sequence. Enter BIOS to confirm detected components and enable XMP if RAM is compatible.
Tip: If POST fails, recheck seating and BIOS version before swapping parts. - 8
Install OS and drivers, run tests
Install the operating system, update drivers, and run basic stress tests to validate stability. Document changes and keep a future upgrade plan.
Tip: Create a recovery drive in case of driver conflicts.
Questions & Answers
What defines component compatibility in a PC build?
Compatibility means all parts fit physically, communicate correctly, and support the intended software. This includes matching CPU socket and motherboard chipset, RAM type and speed, storage interfaces, power connectors, and firmware support.
Compatibility means parts fit and work together, from socket to firmware.
Do I need to match RAM type (DDR4 vs DDR5) to the motherboard?
Yes. Choose RAM that the motherboard explicitly supports, and stay within the recommended speed range. Mixing generations or speeds can cause instability or reduced performance.
RAM needs to match what the motherboard supports for best stability.
Can I reuse an old PSU or GPU if upgrading others?
You can reuse them only if they meet the system’s wattage and connector requirements. Always verify that the previous components will still power the upgraded parts reliably.
Reusing parts is possible, but verify power and connectors first.
Is a small case compatible with full-length GPUs?
Not always. Measure the maximum GPU length for the case and compare it to the GPU’s dimensions before purchase.
Check GPU length against case clearance.
How do I verify BIOS compatibility with a new CPU?
Check the motherboard’s CPU support list and confirm you have the correct BIOS version. If needed, perform a BIOS update before installing the CPU.
Look up CPU support and update BIOS if needed.
What about peripherals and storage interface compatibility?
Ensure the motherboard has enough USB ports, PCIe lanes, and storage interfaces (NVMe/SATA) for your peripherals and drives. Plan ahead for expansion.
Make sure interfaces and ports match your needs.
Watch Video
Highlights
- Define goals before component selection.
- Verify CPU socket, RAM, and PSU compatibility early.
- Plan for upgrades with headroom and case clearance.
- Test stability after initial OS installation.