Motherboard Compatibility Check: A Step-by-Step Guide
Learn how to verify motherboard compatibility with CPU sockets, RAM types, form factors, BIOS, and storage. This educational guide provides a practical checklist, clear steps, and expert tips to avoid costly mismatches and ensure a smooth build.

In this guide you will learn how to perform a motherboard compatibility check before purchasing parts. Gather your CPU, RAM, motherboard model, case form factor, and power supply details; then verify socket compatibility, RAM type, PCIe availability, and BIOS support. This ensures a smooth, upgrade-friendly build. Following these steps helps you avoid buying parts that won't fit or boot.
Why motherboard compatibility matters
According to My Compatibility, a smooth PC build starts with a solid compatibility check. The motherboard is the central hub that connects the CPU, memory, storage, graphics, and power—a mismatch here can stop your system before you press the power button. Compatibility affects not just whether the system boots, but also performance, cooling, and upgradability. In this section, we outline the most critical compatibility axes and explain how to verify them early in the shopping process.
First, understand socket and chipset. The CPU socket is the physical interface between the CPU and the motherboard; the chipset determines features like overclocking, I/O options, and memory support. Mismatches can prevent boot, disable features, or limit memory speeds. Second, form factor matters: ATX, micro-ATX, and mini-ITX must fit both the case and power delivery layout. Third, memory compatibility is not just about DDR type; it includes speed, capacity, and slot count. Finally, expansion and storage pathways—PCIe slots, M.2 ports, and SATA ports—define what you can install now and later.
Core compatibility factors you must verify
A robust motherboard compatibility check focuses on several core factors.
- Socket type: The CPU must physically fit the socket on the motherboard. Even if a CPU fits in a similar-socket family, no feature match means it won't boot.
- Chipset features: The chipset determines memory support, PCIe lanes, USB options, and overclocking capability. A mismatch here can lock you into limited performance or features.
- Form factor and case fit: ATX, micro-ATX, and Mini-ITX have exact mounting hole patterns and I/O panel sizes. A wrong form factor will physically not align with the case.
- RAM compatibility: DDR generation (DDR4 vs DDR5), maximum speed, and maximum capacity matter. Some boards cap memory frequency after POST; others require XMP or SPD settings.
- Expansion slots and storage: Ensure enough PCIe slots for GPUs or add-in cards, plus the number of SATA ports and M.2 slots for storage.
- Power delivery: CPU power connector type (8-pin vs 4+4) and VRM design impact stability, particularly for high-end CPUs or overclocking.
Reading the spec sheet and product QVL lists
Before buying, pull the official spec sheet from the motherboard vendor’s site and cross-reference every line. Look for socket type, supported memory types, and BIOS version requirements. The QVL (Qualified Vendors List) for RAM is critical: it shows exactly which RAM kits have been tested by the manufacturer. If your RAM isn’t on the QVL, you may still be able to run it, but you’ll rely on memory-specific tier notes or manual tuning that could compromise stability. Also check PCIe slot versions (2.0/3.0/4.0/5.0) and the presence of NVMe support on M.2 slots. Some boards require a BIOS update to recognize newer CPUs, so confirm whether you’ll need a CPU that’s already supported to apply the update.
RAM and storage compatibility specifics
Memory compatibility hinges on the DDR generation (DDR4 vs DDR5), speed ratings, and channels. A motherboard’s memory slots may support a range of speeds, but highest-rated speeds usually require enabling XMP profiles in BIOS and even a BIOS update. If you plan to overclock, verify official memory support for the exact kit you intend to buy and confirm the maximum voltage and timing ranges. For storage, confirm the number of SATA ports and M.2 NVMe slots, along with any PCIe-based storage options. If you rely on NVMe, check the PCIe lane allocation for the M.2 slot to avoid bandwidth conflicts with GPUs or other devices.
Case, cooling, and power delivery considerations
Form factor is not the only dimension to check. Some cases support rear I/O panel spacing that conflicts with large air coolers or AIO radiators. Measure GPU length and cooler height to ensure clearance. The motherboard’s mounting hole pattern must align exactly with the case standoffs, and screw-hole spacing should match. For power delivery, ensure your PSU provides the required PCIe power cables and CPU power connectors (8-pin, sometimes 4+4). If you plan to overclock, review VRM quality and thermal design; a high-end CPU on a weak board can throttle performance.
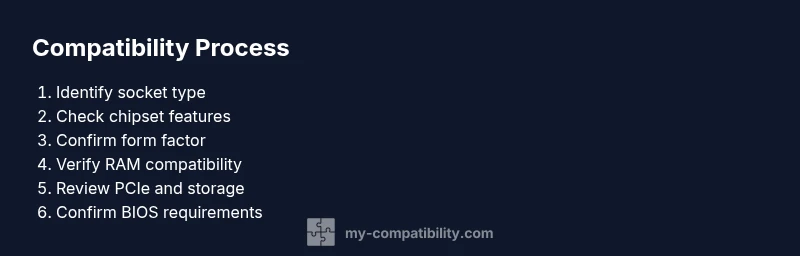
Practical compatibility checklist
Use a simple matrix to compare:
- CPU socket vs motherboard socket.
- RAM generation and speed vs motherboard supported speeds.
- Form factor vs case support.
- PCIe slot counts vs GPU/Cards.
- NVMe M.2 vs PCIe lanes conflict.
- BIOS version vs CPU compatibility.
Create a checklist using your exact models; use vendor pages; if there’s a mismatch, look for alternative boards or consider waiting for a BIOS update.
Tools & Materials
- Motherboard model and chipset documentation(Record socket type, supported RAM, form factor, BIOS requirements.)
- CPU model and socket type(Ensure CPU socket matches motherboard socket; verify supported microcode.)
- RAM modules specifications(DDR generation (DDR4/DDR5), speed, capacity, and channels.)
- Case dimensions and motherboard mounting(Check form factor fit and standoff alignment.)
- Power supply unit (PSU) with cables(Confirm CPU and PCIe power connectors required by the motherboard and GPU.)
- Measuring tools(Tape measure or calipers for case clearance and GPU length.)
- BIOS/UEFI version and update method(Some CPUs require BIOS updates before boot.)
Steps
Estimated time: 60-90 minutes
- 1
Inventory your components
Gather the exact model numbers for the motherboard, CPU, RAM, case, and PSU. Create a simple spreadsheet or list to track each component’s key specs (socket type, DDR generation, form factor, PCIe version). This creates a reliable baseline for compatibility checks.
Tip: Use manufacturer product pages to extract official specs rather than relying on third-party listings. - 2
Verify CPU socket and chipset compatibility
Cross-check that the CPU socket on the motherboard matches your processor and that the chipset supports your intended features (overclocking, PCIe lanes, USB options). If unsure, consult the official CPU compatibility list from the motherboard maker.
Tip: Even within the same socket family, small chipset differences can affect features and memory support. - 3
Confirm RAM compatibility and configuration
Ensure DDR generation, maximum supported speed, and maximum capacity per channel align with the motherboard’s specs. Verify QVL RAM kits if you plan to maximize stability and performance.
Tip: If your RAM isn’t on the QVL, you may still get it to work, but you should be prepared to manually tune timings. - 4
Check form factor and case fit
Match the motherboard form factor (ATX, micro-ATX, Mini-ITX) to the case’s supported sizes. Confirm the I/O shield aligns with the motherboard cutout and that mounting holes line up with the case standoffs.
Tip: A wrong form factor is a showstopper before you power on. - 5
Assess PCIe slots and storage options
Count PCIe slots and confirm the version (PCIe 3.0/4.0/5.0) for GPUs and add-in cards. Check the number of M.2 and SATA ports to plan storage expansion.
Tip: Plan for future expansion; leaving space for a second NVMe drive or a future GPU can save upgrades later. - 6
Evaluate power delivery and cooling needs
Ensure the PSU has the required CPU and GPU power connectors and that the VRMs on the motherboard can handle your CPU’s workload. Consider case airflow and cooler height.
Tip: Overclocking-ready setups demand robust VRMs and adequate cooling. - 7
Review BIOS/UEFI requirements
Some CPUs require a BIOS update before booting with a new motherboard. If you can’t post, you may need a compatible older CPU to flash the BIOS or use the manufacturer’s BIOS flash back feature.
Tip: Check if BIOS Flashback is available on the motherboard. - 8
Create a compatibility matrix
Create a one-page matrix listing socket, RAM type, form factor, PCIe, and BIOS requirements for each component. This helps you visualize any gaps and re-evaluate choices.
Tip: A snapshot sheet prevents last-minute surprises during build day. - 9
Finalize purchases with a plan
If all checks pass, proceed to purchase. If you find a mismatch, backtrack to adjust either the motherboard choice or other components.
Tip: Don’t rush purchases; a small change now saves headaches later.
Questions & Answers
What is a motherboard compatibility check and why is it important?
A motherboard compatibility check confirms that the CPU socket, RAM type, form factor, storage interfaces, and power connections will work together with the motherboard. It prevents non-boot scenarios and post-boot instability by catching mismatches before you buy.
A motherboard compatibility check makes sure every part will fit and boot together, saving time and money before you buy.
How do I know if my CPU is compatible with a motherboard?
Check the motherboard’s official CPU compatibility list and verify the socket type matches the CPU. Also review the chipset features and confirm BIOS version compatibility for your CPU model.
Look at the motherboard’s CPU support list and ensure the socket and BIOS version match your processor.
Can I reuse RAM from an old build with a new motherboard?
Yes, you can reuse RAM if the RAM type (DDR generation) and speed are supported by the new motherboard. If unsure, run a post with the bare minimum configuration to test stability and update BIOS as needed.
RAM reuse is possible if the new board supports the same DDR type and speed.
What should I do if the system doesn’t post after building?
Double-check CPU seating, power connections, RAM seating, and the motherboard power indicators. Reset BIOS if needed and try minimal boot with essential components.
Check power connections and seating, then try a minimal boot to diagnose.
Are there common RAM compatibility issues to watch for?
RAM compatibility issues often involve mismatched DDR generation, inadequate voltage, or timings that the motherboard cannot stabilize. Always consult the QVL and ensure the memory kit is compatible with the motherboard’s BIOS version.
Common issues are DDR type mismatches and BIOS compatibility with RAM.
Watch Video
Highlights
- Plan compatibility before buying parts
- Verify socket, chipset, and RAM specs early
- Ensure case form factor and GPU clearance match
- Check BIOS requirements for CPU compatibility
- Create a written compatibility checklist to avoid mistakes