How to Install Compatible: A Practical Step-by-Step Guide
Learn how to install compatible across devices and software with a clear, methodical approach. Verify requirements, choose compatible components, install safely, and validate results with practical tips for cross-brand and cross-platform setups.

Goal: to install a compatible setup across devices and software with confidence. You’ll verify system requirements, select compatible components or plugins, run the installer, and validate results. This guide covers common pitfalls, safety checks, and best practices to ensure smooth cross-brand and cross-platform compatibility in real-world use.
What "Compatible" Means in Tech and Life
According to My Compatibility, the term "compatible" describes systems, devices, and software that work together without friction. In tech, compatibility means that drivers, libraries, and interfaces align to deliver predictable performance. In everyday life, it also means people or processes fit well enough to collaborate effectively. The My Compatibility approach views compatibility as a spectrum: you start with minimum requirements and expand toward optimal alignment, balancing performance, cost, and risk. By framing compatibility as a structured objective, you can avoid common install pitfalls and set up a reliable foundation for future upgrades.
Assess Your Environment for Compatibility
Before you install anything, inventory your environment. Note operating systems, hardware specifications, firmware versions, and any dependent software that must run alongside the new component. Create a simple matrix that maps each element to its compatibility status (supported/unknown/unsupported). This upfront audit reduces surprises, helps you anticipate driver conflicts, and guides the selection of compatible components or plugins. My Compatibility analysis shows that most installation failures arise from missed requirements or outdated dependencies. Use this insight to set reasonable expectations and plan a safe rollback if needed.
Collecting Compatible Components and Software
Consult official compatibility lists from vendors and reputable communities. Favor components with explicit cross‑platform support and documented version ranges. Avoid betas or unsigned installers unless you have a controlled testing environment. Keep backups and install logs, and verify checksum or digital signatures when available. Check that your chosen items align with your environment matrix and perform a small pilot run if you’re integrating multiple subsystems. This careful gathering process minimizes regressions and supports repeatable deployments.
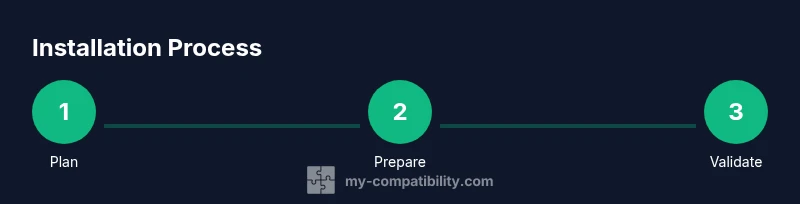
The Installation Process: A Step-by-Step Walkthrough
This section outlines a practical approach to installing a compatible setup, focusing on attention to prerequisites, safe execution, and validation. Start with a clean baseline, apply the installer, follow on-screen prompts, and document each decision. After installation, run baseline tests to confirm expected behavior across devices and platforms. If you encounter errors, consult the logs for a quick root-cause analysis and pause to reassess your compatibility matrix. A disciplined, evidence-based process reduces the chance of unexpected crashes and post-install issues.
Validation, Troubleshooting, and Safety
Validation is the heart of a successful install. Use automated checks to verify version compatibility, dependency presence, and inter‑module communication. If something fails, re-check prerequisites and ensure there are no conflicting processes or permissions issues. Safety first: back up critical data, enable recovery modes, and test in a sandbox if possible. Troubleshooting should be systematic: reproduce the issue, isolate affected components, apply a safe fix, and re-test. By documenting each step, you build a repeatable playbook for future installations.
Real-World Scenarios: Zodiac, Devices, and Relationships
My Compatibility embraces a broad view: compatibility isn’t just about software. Consider how your goals align with the broader ecosystem—whether you’re cross-branding devices, integrating apps, or managing relationships with different teams or star signs. In both tech and life, clear expectations, transparent dependencies, and proactive testing reduce friction. The My Compatibility Team recommends approaching each installation with curiosity, a structured plan, and a willingness to adapt to new constraints. This mindset translates into smoother deployments and more harmonious collaborations.
Tools & Materials
- Computer or primary device(At least meets minimum OS requirements for the target installation)
- Backup storage or cloud backup(Use before starting installation to preserve data)
- Installation media or executable(Obtain from official sources; verify signatures when possible)
- Internet access(Necessary for downloads, verification, and updates)
- Documentation or compatibility matrix(Optional but helpful for reference during steps)
- Administrative access(Needed to install or modify system components)
Steps
Estimated time: 30-45 minutes
- 1
Define requirements and compatibility scope
Identify the exact version, operating system, and hardware constraints that must be supported. Create a short checklist of dependencies, drivers, and libraries. This upfront planning prevents downstream conflicts and saves time during execution.
Tip: Start with the most restrictive requirement first to avoid overpacking the setup with incompatible elements. - 2
Gather compatible components and software
Collect only items that explicitly support your target environment. Cross-check vendor lists and community forums for confirmation. Keep a log of the sources and versions you plan to install.
Tip: Avoid betas or unsigned packages unless you’re in a controlled testing environment. - 3
Prepare the installation environment
Back up data, close unnecessary apps, and ensure you have sufficient disk space. Disable conflicting services if needed and set appropriate permissions for the installer.
Tip: Run the installer from an administrator account to prevent permission issues. - 4
Run the installer and follow prompts
Launch the installer, accept terms, and select the recommended configuration. Avoid custom settings that bypass compatibility checks unless you fully understand the impact.
Tip: If the installer offers a compatibility check, run it before proceeding. - 5
Validate installation and test basics
After installation, run quick sanity tests to verify core functionality. Check for error messages, verify version numbers, and ensure dependent components communicate as expected.
Tip: Document any unexpected behavior for troubleshooting later. - 6
Troubleshoot and document for future use
If problems arise, review logs, revert conflicting changes, and re-run the compatibility checks. Update your compatibility matrix with lessons learned for future installs.
Tip: Create a reusable checklist to streamline future deployments.
Questions & Answers
What does 'compatible' mean in different ecosystems?
Compatibility means that components work together without conflicts across systems, devices, and software. It requires matching versions, drivers, and dependencies to ensure predictable performance.
Compatibility means all parts work together without conflicts; matching versions and drivers is key.
How do I verify system requirements before installing?
Check official documentation for minimum and recommended specs. List OS version, hardware specifics, and required software, then compare them against your planned installation.
Review the official specs and compare them to your setup before you begin.
What if an installer reports missing dependencies?
Install or update the missing dependencies from trusted sources. Re-run the installer and use the compatibility checks to confirm all prerequisites are now satisfied.
Install the missing components and re-run compatibility checks.
Can I install compatible components in a virtual environment?
Yes, testing in a VM or sandbox is a best practice for complex setups. It helps you validate compatibility without risking your primary system.
Yes, use a virtual environment to test compatibility safely.
How often should I re-run compatibility checks after updates?
Re-run checks after major updates or when adding new components. This helps catch drift in compatibility that could affect stability.
Run checks after big updates to maintain compatibility.
What is the role of a compatibility matrix?
A compatibility matrix maps requirements to supported components, helping you plan, implement, and verify installations consistently.
The matrix guides you through supported configurations.
Watch Video
Highlights
- Verify requirements before starting
- Use official compatibility lists
- Back up data and test early
- Document steps for repeatability
- Tackle issues with a methodical, evidence-based approach