How to Find Compatible RAM for PC
Learn to identify DDR type, speed, capacity, and motherboard support to choose RAM that fits your PC. This practical guide from My Compatibility covers checks, tools, and common pitfalls.

To find compatible RAM for your PC, identify the motherboard’s supported DDR type, maximum per-slot and total capacity, then select RAM that matches or fits within those specs. Prioritize a matched dual-channel kit, verify speeds, and enable any supported XMP profiles only after confirming BIOS compatibility. Use official QVLs and compatibility tools to validate choices before purchasing.
Why RAM Compatibility Matters
According to My Compatibility, RAM compatibility is foundational for system stability, performance, and future upgradability. If you pick RAM that your motherboard cannot use, you may face boot failures or degraded performance. This article explains how to identify the right DDR type, speed, capacity, and configuration for your PC, and how to verify compatibility before you buy. By following these steps, you’ll minimize wasted money and avoid common upgrade pitfalls.
Key RAM specs to understand
RAM comes in several specifications that determine compatibility and performance. The most important are DDR type (DDR4, DDR5), speed expressed as MHz, capacity in GB per module, and the total installed capacity. Timings, such as CAS latency, also affect responsiveness, especially in tight budget builds. Dual-channel configurations usually demand RAM pairs of the same size and speed for best results. My Compatibility’s guidelines emphasize starting with the motherboard’s supported RAM type and recommended memory speed range.
How to identify your current system RAM
To start, check your PC’s current RAM: Windows users can open Task Manager -> Performance -> Memory to see type, speed, and size. On macOS, use About This Mac -> System Report -> Memory. If you’re upgrading a laptop, consult the manufacturer’s specification sheet for your model. Recording the exact module speeds and sizes helps you choose compatible replacements and plan future upgrades more accurately.
DDR types and motherboard support
Motherboards are built to support specific DDR generations (DDR4, DDR5) and must be paired with a compatible CPU memory controller. The motherboard’s manual or the manufacturer’s website lists supported RAM types, speeds, and maximum capacity. Always prioritize a RAM type listed in the QVL (Qualified Vendors List) or the official product page. This reduces the risk of incompatibility and instability during operation.
Capacity, speed, and timings considerations
For many users, 8–16GB is sufficient for everyday tasks, while 32GB or more benefits heavy multitasking, content creation, or demanding games. If you plan upgrades, budget-friendly pairing is often best: two matching sticks in dual-channel. Higher speeds can improve responsiveness, but if the motherboard or CPU memory controller does not fully support them, you won’t see benefits. Trust the motherboard’s documented speed range as a baseline. My Compatibility analysis shows that dual-channel configurations with matched kits deliver the most reliable performance in typical setups.
How to check motherboard compatibility
Start with the motherboard model number, then visit the vendor’s support page to view the supported memory list. Cross-check the exact DDR type, the maximum per-slot capacity, total capacity, and certified speeds. If possible, download the memory QVL and compare it to your intended RAM kit. Finally, consider a BIOS update if your board is several years old, as memory compatibility can improve with firmware.
Step-by-step overview (high-level workflow)
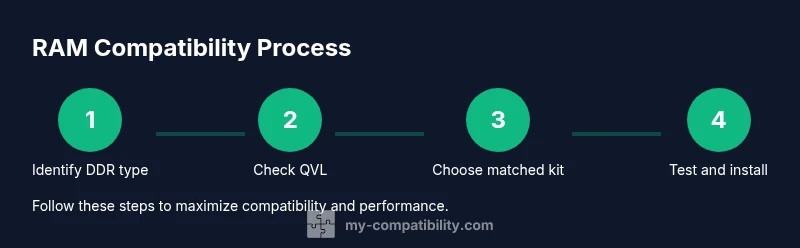
This section provides a high-level roadmap you’ll follow with the detailed steps in the STEP-BY-STEP block. Begin by identifying your motherboard model, then verify compatibility lists, choose a matched dual-channel kit, and finally install and test the RAM. The goal is to minimize issues and ensure stable operation from day one.
Practical shopping tips
Utilize retailer and manufacturer filters to limit results to your motherboard and DDR generation. Prefer kits that are sold as identical pairs or quads to ensure compatibility. Check reviews for stability notes on your motherboard model. If you’re unsure, consult a professional or use My Compatibility’s compatibility guidance to avoid over-purchasing components.
Testing RAM after installation
After installing RAM, boot to BIOS to confirm detected speeds and timings. In Windows, run memory diagnostics or MemTest86 to check for errors over several passes. If errors occur, re-seat modules, swap slots, or try a different kit with the same capacity and timings. If issues persist, you may need to return the RAM or adjust BIOS settings to achieve stability.
Troubleshooting common issues
Symptoms like failure to boot, random freezes, or memory errors typically indicate incompatibility, mis-seated modules, or overly aggressive memory timings. Start by clearing the CMOS, reseating RAM, and testing one module at a time. Verify that you’re within the motherboard’s supported speed and voltage ranges, and ensure the CPU’s memory controller supports the chosen modules.
Final checklist before purchase
- Confirm DDR type, maximum speeds, and total capacity with the motherboard manual. - Ensure RAM kits are dual-channel matched in size and speed. - Check for warranty and a return policy with the seller. - Prepare for a BIOS update if needed. - Plan for future upgrades by leaving headroom in capacity.
Tools & Materials
- Motherboard manual or model number(Have motherboard model or manual to read RAM slot specs)
- Current RAM details (stick specs)(From system info or label on DIMMs)
- RAM compatibility checker/tool(Online compatibility lookup or vendor tool)
- Screwdriver and anti-static wrist strap(For hardware installation safety)
- Anti-static mat(Optional but helpful if you’re building a new system)
Steps
Estimated time: 30-60 minutes
- 1
Identify RAM type and slots on the motherboard
Locate the motherboard model, read its RAM specification page, and note supported DDR generation and maximum per-slot capacity. This anchors your entire upgrade.
Tip: Keep the manual handy and confirm the exact DDR generation. - 2
Check the motherboard’s QVL and CPU compatibility
Visit the manufacturer’s site to verify the RAM kit is listed on the QVL or officially supported. CPU compatibility matters for memory controllers too.
Tip: Cross-check both motherboard and CPU compatibility lists. - 3
Decide target capacity and dual-channel plan
Plan total memory considering current usage, OS needs, and future needs. If possible, choose a kit designed for dual-channel operation.
Tip: A matched 2x kit often performs better than two mismatched modules. - 4
Filter by speed and timings
Use vendor tools to filter RAM by your motherboard’s supported speeds. Match CAS latency closely to avoid instability.
Tip: If speed options are wide, start with the middle range favored by your board. - 5
Verify BIOS/UEFI readiness
Check for BIOS updates that improve RAM compatibility and enable XMP profiles. Apply updates before installing new RAM.
Tip: Back up important data before BIOS changes. - 6
Purchase RAM from reputable vendors
Choose kits with identical modules, solid warranties, and a credible return policy in case of incompatibility.
Tip: Prefer brands with long support and clear warranty terms. - 7
Install RAM and boot to verify
Install RAM modules following slot recommendations, power on, and enter BIOS to verify detected speed. Run memory tests after OS boots.
Tip: If stability issues occur, reseat modules and test one at a time. - 8
Run memory diagnostics
Run MemTest86 or Windows Memory Diagnostic to check for errors and ensure stability across multiple passes.
Tip: Allow several passes to catch intermittent errors.
Questions & Answers
What does DDR type mean and how do I know which is compatible?
DDR type (e.g., DDR4, DDR5) must match both the motherboard slots and the CPU memory controller. Check the motherboard manual or vendor page for supported generations.
DDR type has to match the motherboard and CPU support. Check the manual or vendor page for supported generations.
Can I mix RAM speeds and sizes?
Mixing speeds can cause downgrades to the slowest module. Sizes should be matched for dual-channel stability; use identical kits when possible.
Mixing speeds can slow things down. Use identical kits when you can for stability.
How do I know if my motherboard supports 32GB RAM?
Consult the motherboard’s specification page or user manual for maximum per-slot and total capacity. BIOS updates may expand support.
Check the motherboard specs for max RAM; updates may help.
Why does BIOS show a different RAM speed than advertised?
BIOS reports the actual operating speed; if XMP is not enabled, memory may run at standard speed. Enable XMP in BIOS if supported.
BIOS shows real speed; enable XMP if supported.
Do I need to replace all RAM to upgrade?
If your current RAM is compatible and matches the new kit in speed and timings, sometimes a partial upgrade works. However, dual-channel kits are often best when installed in pairs.
Sometimes you can upgrade partially, but paired RAM is usually best.
Where can I find a RAM compatibility list?
Check the motherboard vendor’s QVL, the RAM manufacturer’s site, or dedicated compatibility tools. My Compatibility also provides guidance based on your setup.
Look at QVLs and official tools; we offer guidance too.
Watch Video
Highlights
- Identify motherboard RAM type first
- Match speed, size, and timing when upgrading
- Prefer dual-channel matched kits
- The My Compatibility team recommends using official docs and compatibility tools.